Showing posts with label dinner. Show all posts

Tuesday, December 2, 2014

Thanks for Food and Family


Thanksgiving is my most favorite holiday. It's a day to be surrounded by family and food, two things I absolutely love!  There's no pressure to buy anything or wear fancy clothes. Just bring an appetite. And in my family of cooks, there's usually plenty to eat. 

For the third year in a row, we've hosted Thanksgiving at our house. I may be one of the select group of people that really enjoy entertaining. Partly because it forces me to have to clean my house, but mostly I like enjoying simple and good food in a relaxed atmosphere that I can create. No need to take your shoes off but there will be candles and real plates and glasses and hopefully lots of wine. I don't own China and probably never will. The dishes I use for dinner parties have such sentimental value. Most of the olive green dishes you might see in my pictures were my parents when they were married over 25 years ago.  The small glass bowl for the cocktail sauce was my other grandmother's. My huge salad bowl was given to me by my mother-in-law and was made in Italy. The small orange pitcher I use for cream for coffee was my Noni's when she was young. My napkin place mats were purchased at a vintage store in town. I guess I would describe my whole style, from what I wear to how I decorate, to what I cook, as "modern vintage,"combining old with new. I find it comforting I guess...


Thanksgiving is my favorite because it reminds of holidays at my Noni's house growing up. All us cousins would be there, setting the table, making pilgrim hats or playing the piano. It was a time when there was nothing to worry about, everything seemed easy... a rare occasion nowadays. Somehow about 15 people sat at my Noni's dining room table. Us kids would usually fight over who got a chair and who had to sit on the piano bench...I feel like I always ended up with the bench. Sitting in a chair just made you feel like a "big" kid so my older sisters won those. But I didn't mind much because then I got to sit with my younger cousin.

Although we're Italian, I don't remember us eating anything "traditional" Italians would have on Thanksgiving...besides my Popi's salad. No one can make a salad like he did. He'd make it with tons of red wine vinegar so you'd have the perfect amount leftover to sop up with a big fat chunk of Italian bread. He'd even sneak us a splash of wine in it too. We always had my Noni's sausage stuffing but I have to admit, that to this day, I still prefer Stove Top. And the turkey was at least 20 pounds, which I also never ate. Mashed potatoes, corn and some stuffing is all I need. Not much has changed.
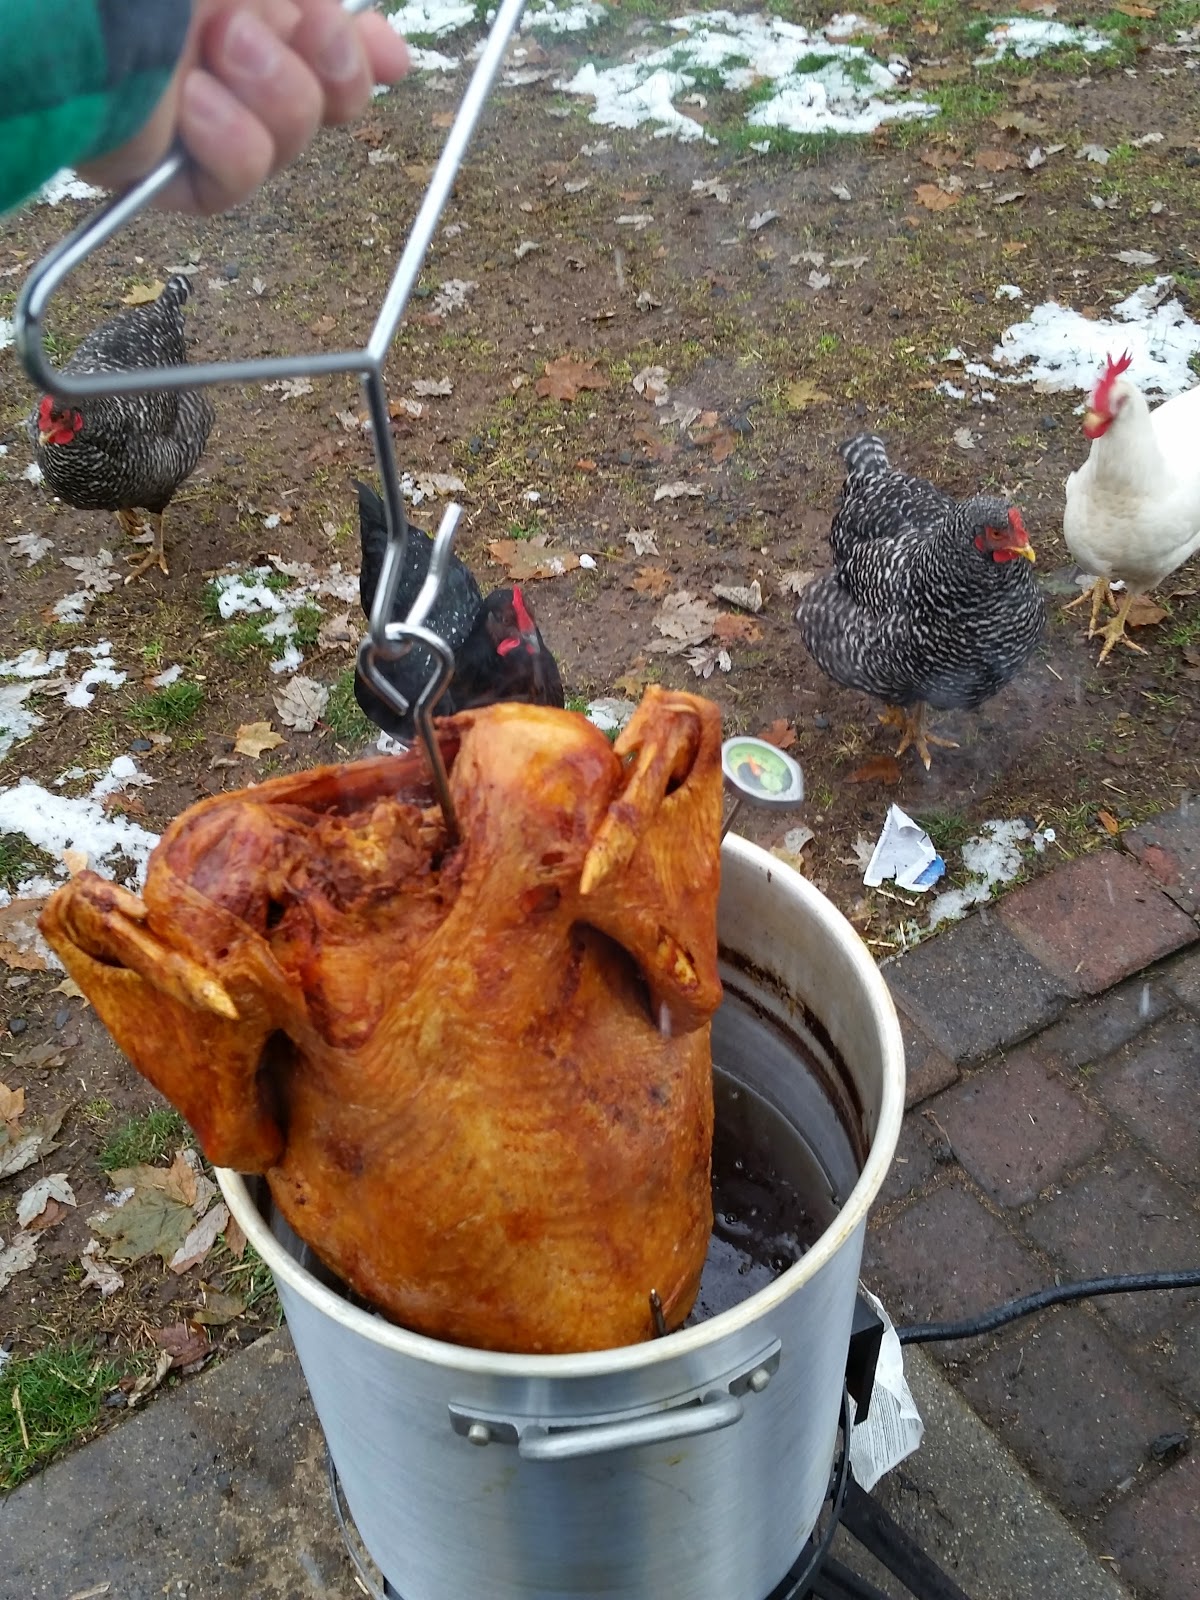
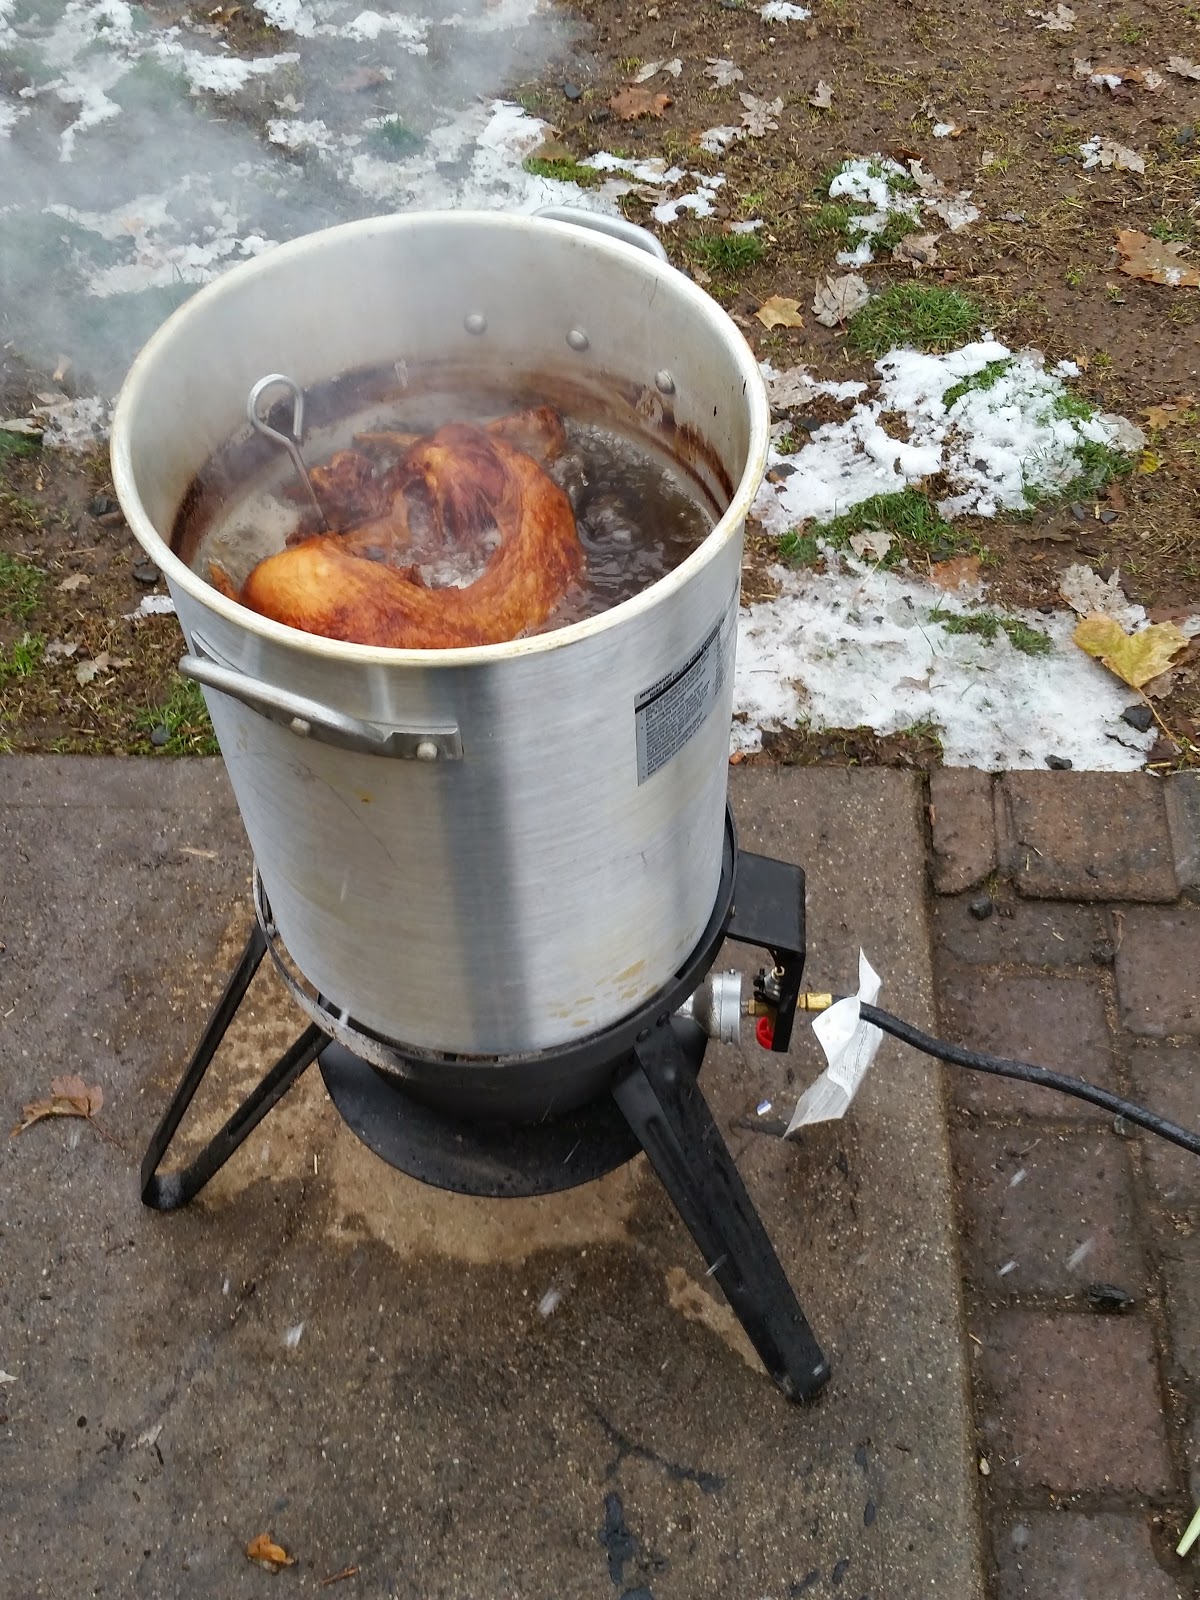

But, now that we host Thanksgiving, I get to have all my favorite foods and throw in some new dishes. We did have sausage stuffing thanks to my mother-in-law, and green bean casserole and cranberry sauce...yuck. My Noni make an amazing cranberry sauce with chestnuts, it's the only kind I'll eat. My husband fries the turkey. I take on the tedious task of making mashed potatoes since our moms got plenty other stuff to do...like make stove top stuffing for us and lots of desserts.  I tried out a few new recipes this year that I absolutely loved. So here's a few...

* I have to apologize in advance for the lack/quality of photos. Once the food was out, nothing else really mattered.

For starters...

Kale, Cranberry and Goat Cheese Salad
adapted from the Clara Persis blog
Makes 4-6 servings

  • One large bunch of kale, cleaned, ends removed and chopped
  • 1/3 cup dried cranberries
  • 1/3 cup toasted walnuts pieces
  • 1/3 cup of crumbled goat cheese
  • 3 TBS olive oil
  • 2 tsp fresh lemon juice
  • 1 tsp apple cider vinegar
  • sea salt 
Drizzle the oil, lemon juice and vinegar over the kale. Use your hands and literally massage the kale. This is super important because kale is very hearty and fibrous. The oils and acids will help break it down a bit so it is easier to eat. Raw kale makes a great salad because it doesn't get soggy like some other kinds of lettuces can be.

Sprinkle on a few pinches of sea salt.

Throw your cranberries, walnuts and goat cheese in. Carefully fold all the ingredients together coating them with the olive oil and lemon juice.

Chill for about 20 minutes and serve.
Makes for a perfect Christmas dish too! Love the colors!

I was almost disappointed having some leftover but surprisingly, it held up and was still good to eat the next day! This is my new favorite salad...until I OD on kale again.
Bloomin Onion
Makes 10 servings
  •  2 large yellow onions
  • 1 1/2 cups flour
  • 1/2 tsp paprika
  • 1/2 tsp garlic powder
  • 1/2 tsp cumin
  • 1/2 tsp pepper
  • 1 bottle of good beer, think we used Sam Adams Boston 
  • oil for frying
Prep your onions. You want to cut off a small part of both ends so it can stand. Then, you need to cut almost completely through the onion about 1/4 inch from the bottom. Do this at least 8 times. You should end up with about 16 sections. Here's a link WITH PHOTOS, since I forgot. 

Carve out a hollow part right in the middle. This will allow the batter to seep through.
I also dropped mine in boiling water for about 2 minutes to soften it up a little so the pieces would spread apart easier.

Combine your dry ingredients. Then add your beer. The batter should be similar to pancake batter but if you find it's a little thick, add some water.

Coat you onion really well in the batter then drop it in the oil. Since we already had hot oil from frying the turkey, this was pretty easy.

Shrimp cocktail is a must. Always serve over ice!
Let the onions swim around for a few minutes, moving it around so it cooks all the way. It should only take maybe 6-8 minutes til its nice and golden brown. 


Serve with this dipping sauce that tastes even better than Outback's. 


1/2 cup mayo
1/4 cup ketchup
2 tbs A-1 sauce
1/4 tsp garlic powder
2 TBS horseradish

Combine all ingredients and refrigerate til ready to serve.

This thing didn't even have a chance for a cameo it went so fast!


Now onto dessert...normally we would have sweet potatoes with brown sugar but I always feel guilty eating double doses of potatoes. So, why not turn your typical sweet potatoes with marshmallows into dessert?! Even better... a bread pudding.

Sweet Potato Bread Pudding 
Adapted from Rachel Cooks
Makes 8-10 servings
  • 2 medium sized sweet potatoes, should be about 1 1/2 cup mashed
  • 2 1/2 cups milk
  • 4 eggs
  • 1 1/2 tsp vanilla
  • 1 tsp nutmeg
  • 1 tsp cinnamon
  • 1 cup brown sugar 
  • 1 1/2 loaves of cinnamon swirl bread, cubed
  • 1/2 stick of butter
  • 1 bag mini marshmallows
Preheat your oven to 350.
For this recipe, I cooked my potatoes in the microwave. It has a magical "potato" button on it that works perfectly.  Once they're done, cut them in half and just scoop out the flesh and mash.

In a greased 9x13 inch baking dish, spread out half of your bread. Spoon your mashed sweet potatoes on top then layer with bread again.

In a separate bowl, mix all your other ingredients. Pour on top of the bread. Use your hands to push down the bread so it gets a chance to soak up some liquid.

Bake for about 45 minutes until most of the liquid is gone.

Top with mini marshmallows and broil until just golden brown...aka don't shut the oven and walk away! Doing all these things made my kitchen a little chaotic and I ended up putting the bag of marshmallows on my hot burner, which resulted in the bag opening up once I realized the burner was hot and releasing tons of mini marshmallows that ended up at the bottom of my, also hot, oven. Thank you to my husband for cleaning them up immediately because honestly at that point, I didn't even care. They would've burned off eventually right? 
Serve warm and toasty.


I'm so very thankful to have spent another Thanksgiving with my family, although there were a few important people that couldn't make it. Looking forward to next year and many more to come!

Thank You. 


Sunday, November 9, 2014

Mediterranean Baked Chicken

Grocery shopping...a chore most of us despise. I think I am part of a small percentage of people that look at it like a field trip and a game. How little can I spend on some good quality food to make most of what you see here? And how fast can I get in and out of the store without running into someone I see to distract me from be beating my record of 28 minutes?

I usually at least write a list of stuff I need, but it never makes it to the store with me and sits on my kitchen counter. I was in the mood for something Italian but didn't want to make the traditional sauce. I've been trying to eat a little "lighter" lately and have been making some killer salads. Yeah, serious salads. But I was channeling my inner Italian, or my mom's antipasto squares, and ended up with salami, pepperoni, provolone cheese, kalamata olives, roasted red peppers, artichoke hearts, spinach and feta cheese in my cart.  If this was served with a huge end piece of fresh Italian bread, I would be in heaven.

My intentions when I started cooking were to make a tomato florentine soup.  I blended the rest of my tomatoes from the garden and began cooking it down, mixed with some chicken stock. I thew in some of my fresh spinach and grated cheese and garlic. It smelled amazing, buuuuut, it just wasn't feeling like soup weather so I put in the fridge and ate a salad instead.

All day long I think about food. My meals are sometimes planned while I'm daydreaming at work or on the spot when I open my fridge. This one I'd been drooling over out for a bit...


Mediterranean Chicken
Serves 2

  • 2 large chicken breasts
  • 1 cup crushed tomatoes (I used fresh but you can use a can)
  • 1 cup fresh spinach, chopped
  • 4 cloves garlic
  • 1/4 cup kalamata olives
  • 4 artichoke hearts
  • 1/4 cup feta cheese
  • 1/4 cup parmesan cheese 
  • 1/4 cup breads crumbs
  • salt and pepper
  • dried parsley
  • basil (I had frozen but dried will work okay too)
  • French bread
Preheat oven to 350.
In a shallow baking dish, drizzle a little bit of olive oil and out your chicken breasts in (trim the fat, please!).
Toss in your garlic cloves, WHOLE!

Drizzle a litle bit of olive oil on top of the chicken then sprinkle the bread crumbs.

Cover and bake about 20 minutes then remove the cover, add the olives and artichoke hearts and bake another 10 minutes or until the chicken reaches 165 degrees. You want the chicken to have a light golden brown top.

While the chicken is cooking, prep your other ingredients, which there aren't many. 
In a pan over medium low heat, heat up your crushed tomatoes. Add the spinach, basil and parmesan cheese and salt and pepper to taste (This is where my "soup" comes in).

Prep your crostini. Slice the bread diagonally, just because it looks fancier. Drizzle with a bit of olive oil, or butter.  *I would add this in the oven during the last few minutes the chicken is baking. You can sprinkle some garlic powder or oregano on it if you'd like.

Now that everything's done, the plating is the most important part!

Spoon some tomato/spinach "sauce" on a plate.
Add a lovely little chicken breast. Be sure to scoop some olives, artichokes and entire cloves of garlic on top too.
Sprinkle with some feta cheese and parsley.
Serve with at least 2 pieces of crostini to sop up all the delicious flavors left behind.


This was really really really good! And gone in seconds...

Mangia!


Thursday, October 30, 2014

A Lil Asian Inspiration

I love any kind of Asian food. I cook it pretty often so I always have the right ingredients. Almost anything can be given an Asian twist by using hoisin sauce, soy sauce, rice vinegar and sesame seeds..and of course Siracha.
 

Asian Style Pulled Pork

4 Pork Tenderloins
4 tbs hoison sauce
3 tsp rice vinegar
3 tsp low sodium soy sauce
3 tbs brown sugar
1 tsp minced garlic
1/2 fresh lime juice
quirt of Siracha, if you like it hot
Sesame seeds


Place your pork in the crockpot.
In a separte bowl combine all the other ingredients.
Pour over pork but be sure to coat all sides.
Cook on high for the first hour, then turn down to low for another 3-4 hours.
Use a fork to shred.
Serve in Romaine lettuce. Top with some sesame seeds.

*If you want to make a sauce to go with this, since the juices from the pulled pork tend to be a bit watery, just pour them into a small saucepan and combine with a teaspoon of cornstarch over medium low heat. Let it come to a boil and it will thicken almost immediately.

My husband was a little hesitant about the lettuce wraps...he loves his carbs...but it just goes so much better with this meal. It's light and fresh and the crunch of the lettuce is the perfect contrast against the tender pulled pork. And it doesn't make you feel like crap afterwards


Carrot and Cabbage Asian Slaw   

Half a purple cabbage, shredded
Half a bag of baby carrots, shredded
1/4 cup rice wine vinegar
1 tbs sugar
1 tbs teriyaki sauce
3 tbs olive oil
Cilantro
Some scallions would be nice too, but I didn't have any

Combine the vinegar, sugar, teriyaki and oil in a bowl.  Toss with the cabbage and carrots.  Tastes best if you refrigerate it for at least an hour. Sprinkle with some fresh cilantro before serving.


Roasted Siracha Cauliflower

Whole head of small cauliflower, about 2 cups broken up
3 tbs low sodium soy sauce
1 tsp garlic powder
3 tbs Olive oil
Siracha

Preheat your oven to 400.
Break up the cauliflower into bite size pieces. Spread in a deep baking dish.
Drizzle all the ingredients on top of the cauliflower.
Bake about 25 minutes, turning occasionally.


Monday, August 11, 2014

The Perfect Pizza

I can't tell you how many times I cooked pizza before I finally found the best way to make it...on the grill.  We don't make it any other way. The grill is the only way and it comes out amazing and done in less than ten minutes. I do have to warn you that it is not easy and might take a few tries to get it down perfectly. We've been grilling pizza for a few years now but still screw it up every once in a while...mostly due to my lack of patience for waiting for the dough to rise. 


I usually start with making my own dough. My husband scolded me one time we messed up the pizza blaming it one the store bought dough.  Homemade dough just tastes better and has a little bit more elasticity...that is if you let it rise completely.

Pizza Dough Recipe 

Makes 1 large pizza about 14" or two 8" pizzas

Combine about 2 1/2 cups of flour, a tablespoon of sugar, sprinkle of salt and a teaspoon of garlic powder in a bowl. I say approximate measurements especially with the flour because you'll be using more when you go to stretch it out.

**Super important next step... get one cup of water to a temperature of 120 degrees.  You definitely need a thermometer for this. If it's too hot the yeast will die and result in your dough not rising at all. If it's not hot enough, the yeast won't activate and make your dough nice and stretchy either.  Once you have the perfect temp, dump in your yeast and whisk until it's dissolved.

I drizzle a tablespoon or two of oil olive into the yeast water. Pour that into your flour mixture and dig in. Hands are the best tools for this. When everything is incorporated, dump your dough out and knead for at least 8 minutes...another super important step! I'm so used to baking where you combine ingredients until they are just mixed so for a while I wasn't kneading enough. My dough would come out flat, dense and chewy.

Not the waiting begins. Even if you buy dough at the store, you still have to wait.  I make my dough first thing in the morning and leave it out on the counter, oiled up, always tightly covered and under a towel all day. Or if it's a sunny day, I put it outside.  It should take a few hours. The perfect temperature for dough to rise is 82 degrees.  The dough should just about double in size by the time it's ready.

Here's a good link to describe and show how to properly stretch your dough...

Some tips for stretching dough:
  • Don't play with it too much. If you overwork your dough, it'll pretty much get tired and not wanna work anymore
  • If you're using a wooden board, place a moist towel underneath it so it doesn't slide all around.
  • Use enough flour so it's not sticky but not too much so it dries it out.
  • Try to make it even thickness, about 1/2 inch.
  • Small holes can be fixed with a little pinching


Fire up the grill...

While you wait for your grill to get up to 450, get all your ingredients in order...mise en place.  This is another really important part because once you get the dough on the grill, you're not gonna have time to walk away and grab everything.


We made two pizzas. It's a little easier to flip a small one then one really big one...and we both like different toppings.   Mine had homemade sauce, which I usually keep on hand in the freezer, homemade pesto made with fresh basil from my garden, plum tomatoes and red onion, both from the garden too! My husband's pizza had chicken, cherry peppers and jalapeno peppers from the garden.

Once you've got everything in place, preferably next to your grill, and the grill is hot and ready, oil up your dough with some olive oil. This is when my husband takes over cooking. The dough has to be totally brushed with oil so there is no chance of it sticking. If you add an excessive amount of oil, it will taste like fried dough, but has the possibility of catching on fire... I'd chance it! We put our dough on a big pizza board with a handle so its really easy to flip and move around. Makes my husband feel like a pro. You can use a wooden cutting board though.  Before you flip your pizza dough onto the grill, make sure it's not stuck to the surface by sliding it around. One of the first times we made grilled pizza, it stuck and folded up on the grill. It was impossible to spread out again. We made the best of it and just ended up with bite size pieces we dipped in sauce and threw toppings on.


When you have successfully flipped it onto the grill, close it for about three minutes. To test if it's done, peek under the dough to look for nice grill marks. It should lift off pretty easily. If it's about done, start brushing it with oil again for the next side to cook.  *Some people choose not to flip their dough and most likely cook it on a lower temp. We've tried that but prefer both sides cooked so you're not left with any raw dough.


As soon as you flip your pizza, start adding your toppings.  We usually end with the cheese so it sandwiches the toppings inside. Close up the grill and let it cook another four or five minutes until the cheese is melted. If you find that your pizza is done but the cheese hasn't melted yet, you can throw it under the broiler in your oven for a few minutes.


Let the pizza sit for a few minutes...if you can wait that long...before you cut it. 


It's seriously the best pizza you will ever make and maybe even eat.


Perfect for summer.  And for your husband to make.


You're Welcome :)

Friday, July 4, 2014

Saved by the Crock Pot

Life has been a little crazy lately between job transitions and a huge project we have going on in our backyard! It's been too long since I've cooked a hearty meal.  Fortunately, it rained the other night, finally, and the market down the street had a huge meat sale so I bought some short ribs.

I've never cooked these before and am usually not a big fan of pork. But anything "rib" related calls out to me. They were on sale for $5.99 a pound an come in chunks with the bone. Sometimes I don't like buying meat like this because I really have no idea how much it will cost. 4 pieces which looked like about 2 servings ended up costing way more than I would have ever spent on meat....almost $15! For one meal, I would rather not spend that much but what the hell, we hadn't eaten something really good in way too long.

From going out to eat a lots of places, I know that short ribs are often "braised." This means combining high and low temperatures to cook a piece of meat. The meat is seared on all sides first then cooked at a lower temp in a liquid for tenderness and moistness. As I usually do when it comes to cooking something new, I look up lots of different recipes. Some called for using Dutch ovens, which I do not own, so I figured the best alternative would be the good ol' crock pot! And of course I didn't have all the ingredients some of the recipes "required" so I improvised and made do with what I had.


Braised Short Ribs
Serves 2

2 lbs short ribs (about 4 pieces)
1 cup red wine I used a Cabernet
1 cup chicken stock  beef would be ideal
1/2 cup celery, chopped
1/4 cup mushroom, chopped
1/4 cup carrots, chopped
4 cloves of garlic, whole
1 tbs tomato paste
1 tbs flour
1 tsp fresh chives
2 tsp scallions, diced
1 tsp fresh parsley
1 tsp oregano
salt and pepper
olive oil

In a large skillet, over medium heat, drizzle about 2 tbs of olive oil. Season short ribs on each side with salt and pepper. Sear short ribs for about 5 minutes on each side then transfer to separate plate.

In the juices leftover, saute the celery, carrots and mushrooms.  Add the tomato paste and flour. Stir well. Add the red wine and bring to a simmer. Add your fresh herbs then the short ribs back to the pan. Simmer for about ten more minutes.


Meanwhile, pour your stock in your crock pot on high heat. Add the whole garlic cloves.

Add all the contents of your skillet to the crock pot. Cover and cook on high heat for one hour then reduce to low heat and cook for another 1 1/2 hours.


Serve over mashed potatoes... and with some bread for soaking up all the incredibly delicious broth left behind in the crock pot. Mmmmmmm, it's amazing!


If possible, use fresh herbs whenever possible. All the original recipes called for onions of which I was out of. But, I did have fresh parsley, chives and red onions growing in my garden. The scallions came from the tops of the onions that were not quite ready to be picked.


While dinner was in the crock pot, I shoveled dirt and put up some fencing....multi-tasking only a woman can do.


You're Welcome

Thursday, June 5, 2014

Last Minute Marsala

Somehow in between baking dozens of cupcakes for a fundraiser this weekend, I managed to make an amazingly delicious and pretty nutritious meal...and squeeze in a power nap. Usually when I have a huge amount of cupcakes to bake, we order out. Being as we are on a budget like most people, I figured I'd just make something quick.

I honestly wasn't expecting this to come out so good considering how quickly I threw it together and didn't really measure so hope my amounts below are accurate. I must have said "wow" at least 10 times when I was eating this, and I never say that about my food. But seriously, wow.  It made me think of the scene in What About Bob when Bill Murray is eating dinner at table with Richard Dreyfuss' family...."Mmmm, mmmmm, mmmm, mmmm....Mmmmm, mmmmm, mmmm, mmmmm. MMMMMMMM!" If you don't' know what I'm referring to, please go watch this movie immediately. My dad introduced us to the best movies.

Baby bella mushrooms were on sale last week so I had some in my fridge. I always have chicken on hand. My husband loves chicken and mushrooms....Chicken Marsala!  I rarely ever make it so that's what I did. The main ingredient in this dish is marsala wine which has it's own unique flavor and hard to substitute. Cooking with wine on a budget?! I bought 16oz bottle of marsala cooking wine by Holland House for a whopping $4.00 at the grocery store. You can find it at the package store for pretty cheap too.  It's an Italian wine, similar to a port wine or dry sherry but is what makes chicken marsala, chicken marsala.  I wouldn't recommend substituting it...just make the trip to the grocery store or package store, it'll be worth it.

You can serve this over cauliflower rice, brown rice or, mashed potatoes would be even better...but all I had was veggie noodles, which worked just as good and maybe a bit healthier.

Chicken Marsala
serves 2-3

  • 2 large chicken breasts
  • 3/4 cup chicken stock
  • 1/2 cup flour (if you wanna make it gluten free, use corn starch)
  • 3/4 cup marsala wine
  • 1 tsp balsamic vinegar
  • 1 cup of sliced mushrooms
  • 1/4 cup diced onion
  • 2 TBS olive oil
  • 2 TBS butter
  • 1 tsp oregano
  • 1 tsp parsley
  • 1/2 tsp garlic powder
  • salt
  • pepper

Pound out your chicken and cut the fat off. Combine oregano, flour, garlic powder, salt and pepper.

Dredge your chicken in the flour lightly on both sides.

In a large skillet, heat olive oil and butter over medium heat.

Cook chicken for about 4 minutes on both sides.  Set aside. I put mine in a casserole dish and in the oven on a super low temperature to keep it warm.

In the same pan, saute your mushrooms and onions. After they cook for about 3 minutes, add your chicken stock, marsala wine and balsamic vinegar. Add parsley and more salt and pepper to taste.

Let simmer for about 8 minutes. There should be enough leftover flour from the chicken to make a nice brown sauce.

Pour this over the chicken and serve. 

We had it with veggie noodles and KALE! I say that with excitement because I haven't eaten kale in over a year. I was eating it religiously for a while and trying new ways to cook it. Finally made some kale chips in the oven with sea salt and I ate them all in one night. Me and kale parted ways later that night as I tossed and turned in bed. I never thought I would eat it again. But it was pretty cheap at the grocery store so I bought some.


We have no more kale now.  Or leftovers.

Friday, May 30, 2014

Thank you, Lobster

In my family, a birthday isn't just one day, it's an entire week. For my husband's birthday, I made him a few extra special dinners and treats. This had to include lobster. Before he met me, my husband never had lobster. He never ate sushi, homemade soup or even peanut butter and jelly. Not because my mother-in-law didn't cook but because he was perfectly content living on cheeseburgers, hot dogs and egg sandwiches. He definitely married the right woman ;) So I introduced him to my all time favorite messy, savory, fresh food to eat...lobster.

When I think about lobster, it brings back great memories from being a kid and going on family vacations to Rhode Island. Every summer, my mom would pack up her 1980 brown Volvo station wagon, manual mind you, with us five kids. Who the hell can possibly drive standard with five kids in the car?!?  My step dad would follow with his old Chevy truck, loaded with five bikes and endless amount of beach toys. It was tradition to take a ride to Point Judith and pick out lobsters. I remember being the only one of us kids that got excited for this. I'd get to go look in the huge tanks, not like the ones you see in the supermarket. These were wide open on the floor and there were hundreds of fresh lobsters ready to be boiled, ripped apart and doused in warm butter.  When we got home with out lobsters, it was also tradition for my step dad to "play" with them first and scare the crap out of my little brothers. He'd stick them in the kiddie pool with them, no elastic bands around their claws.

When it was time to eat and the water was boiling, I always left the kitchen because I couldn't watch them die. As quick as my mom could drop them in, they were bright red and fully cooked. If you've never cooked your own lobster, it's really super easy and fast. Just don't let the guilt get to you and say "thank you."

I have to give my step dad credit for teaching me how to eat a lobster and how to drive stick.  My husband says I only like it because it's really messy and I am an incredibly messy eater. So what?!  It's the only food where it's accepted and encouraged to get messy and use your hands. I mean they give you a plastic bib when you eat it in restaurants! Definitely something I would enjoy.

So I cooked us some lobsters for dinner the other day. Going out for lobster dinner would have cost at least $40 per plate and you don't get to see them ahead of time or know where they came from.  I bought our's at Stew Leonard's for just under $20, for both of em. 


So of course this is the only picture I took realizing after I was done eating, it would make a good blog post. I was too excited to think about taking pictures. Plus, my hands were covered in butter.

Tips for cooking and eating lobster:

A good size lobster should be about 1 1/4 pounds.  Anything closer to 2 pounds is going to be tough and not have as much flavor. If you get one that's one pound, you're gonna wish you had more. I could have probably stepped up my game to a pound and a half.

Buy your lobster a few hours before you plan on eating it. You can stick it in the fridge until your ready to cook it.

A lobster should be boiled 8-10 minutes per pound. I boiled 1 1/4 pound lobster for 9 minutes and it was perfect.  It will be bright red. I run it under cold water right after I removed it to stop the cooking process and cool it off. Since we had two lobsters, I used two large pots so they were ready at the same time. Don't try to fit them both in the same pot. You could cook one at a time but the first one may not be hot by the time the water reboils and cooks the other one for an additional 8-10 minutes.

If you feel guilty about boiling it there's a few things you can do to ease the pain, your's and the lobster's.  Supposedly, you can put it in the freezer for a few minutes before hand. It makes the lobster feel a little "sleepy."  Or you can stab it in the head. Yes, it sounds awful but if you take a sharp butcher knife and pierce it through the back of the lobster's head, this kills it quickly. Immediately put it in the pot of water afterwards, if you have the guts to do it. I know I couldn't. 

I just wanted to get it over with as quickly as possible. As soon as I got home I put the lobsters in the fridge, never opening the bag. Once the water was boiled, I took out the lobster, cut off the elastic bands on the claws, dropped it in the pot head first and put the lid on. I set the timer and didn't look back until it went off. Done.

Make sure you have the right tools to open up the lobster. You need a nut cracker for sure and a tiny three pronged fork. We had neither of these. The only hard part is the claws. If you have the tools I mentioned, you'll be eating in no time. So we had to "make-do. "Using the back of a butcher knife, I cracked the claw on a cutting board. I also had a fondue fork which actually worked great. It's perfect for reaching inside the knuckles. You can even suck out meat from all it's tiny little legs. But the best part, as my mouth waters, is the tail...the meatiest, most delectable part of the lobster.  To get to this, rip apart the tail from the rest of the body. Discard the upper part of the body once you've removed the claws because there's nothing really in there.  You can use a knife to carefully cut vertically down the under side of the tail, but I usually just use my man hands and break it open.  My husband likes to use two fingers or a thumb and push out the meat from one end. It comes out in one huge piece.

Melt plenty of butter before hand. I put a stick of real butter, not margarine or any other fake crap, in a small sauce pan on low while the lobsters were cooking.  Oooh and I added a squeeze of lemon to the butter too.

Have a large bowl on the table to collect the juices and shell.  This is messy! I break apart my lobster over the big bowl because you may have some suprises inside. Eggs or leftover lobster poop may be something you find.  If you see bright red or orange pieces inside the tail, just take them out or eat em! They are eggs that haven't been released yet but some people think they're pretty tasty.  If you see a greenish substance, just rinse it off or leave it and eat it too!

I served my lobsters with Garlicky Roasted Green Beans and Twice Baked and Loaded Potatoes. Dessert was Strawberry Shortcake with homemade sweet biscuits and fresh whipped cream. 


Here's a link to some photos of someone painstakingly waiting to eat their lobster in order to get each shot of what I described above.  It's alot of work but that's the fun of eating it and there's no one there to stare at you while you eat with a silly plastic bib tied around your neck. And it beats paying close to $100 for lobster dinner for two.


Seriously, don't forget your bib. And napkins. Lots of em.


You're Welcome.


Wednesday, May 28, 2014

Chinese...No Take out Necesary

I have a love/hate relationship with Chinese food. I love love love to eat it. I hate the feeling after I've only been able to finish half of my container full of General Tso's Chicken and remain planted on the couch the remainder of the night. I love opening the fridge the next day, knowing my leftovers are there so I can eat the rest... and feel like shit all over again.  My solution was to make Thai food. Check out my Coconut Curry Chicken. My last bout with that didn't go so well considering I had to throw away an entire dinner due to overcooked rice noodles. I'm a rule breaker and extremely impatient so this is the result of cutting corners. I'm slowly learning my lesson. I tried to salvage it by adding my freshly cooked veggies and peanut sauce. We couldn't get past the slurpy gooey texture. This one went in the garbage.

This week is my husband's birthday so I figured I'd make him something he really loves to eat.  I don't believe he ever had Chinese food before he met me. I had him eat it once...he was hooked. I found a recipe from i heart naptime. Why didn't I name my blog that?!  Naptime is my favorite. I've made this recipe before and it came out awesome. We will probably never order Chinese again...unless I really want an eggroll which would go perfectly with this, and only partially make me feel like crap. I had to alter it due to our addiction to any and all things spicy. I'm not really even sure what to call this. It's sweet, sour, spicy and salty and super easy!

Sweet 'n Sour n' Spicy Sesame Chicken
Serves 4

  • Two large chicken breasts
  • 2 tbs cornstarch
  • 2 eggs, whisked
  • 1/2 cup ketchup
  • some squirts of Siracha
  • 1 tbs of rice vinegar
  • 1 tbs soy sauce
  • dash of red pepper flakes
  • 1 clove of garlic, minced
  • 1/2 tsp garlic powder
  • 1/2 tsp onion powder
  • 1/2 tsp sesame seeds
  • 1/3 cup brown sugar
  • 1/4 tsp cayenne pepper
  • oil for frying

Cut up your chicken into small pieces, about the size of a half dollar.  In a bowl, toss your chicken, garlic powder, onion powder, cayenne pepper and cornstarch.


Heat up a small amount of oil in a pan, about 1/4 inch. I used vegetable but sesame would be awesome.

Preheat your oven to 350.

In a separate bowl, whisk your eggs. When the oil is hot enough, coat your chicken in the egg then drop carefully in the pan. Cook for about 3 minutes on each side. You are only frying them quickly just to get a crunchy outside. They will finish up in the oven. Have a pan ready with a paper towel on it to soak up an excess grease. I worked in batches.


When your chicken is done frying, put it on a foil lined pan and bake for about 20 minutes. Meanwhile, make your sauce.
 
In a bowl, combine ketchup, soy sauce, rice vinegar, Siracha, sesame seeds, red pepper flakes, minced garlic and brown sugar. This sounded so unbelievably gross to me the first time I read this because I hate ketchup, but it does work really well. I would love to try it with chili sauce though.

After the chicken has been in the oven for about 20 minutes, take it out and toss with your sauce. Throw it back in the oven for about another 15 minutes while you cook your rice and veggies.
I serve over brown rice and broccoli.


Tomorrow I will open my fridge and eat my leftovers and my stomach will feel happy.


You're Welcome.

Wednesday, April 30, 2014

30 Days of Grilled Cheese...Damn right I did

I had no intention of taking on a task like this. But, on March 31st, when I read the following day would be the official start to an entire month dedicated to everyone's favorite comfort food, I gladly accepted the challenge..brought on by my husband. I think it was a secret ploy to get me to make him somethings he loves everyday. 

~Day 1~
Tomato and American Cheese with a side of yellow mustard on Whole Wheat...my go to favorite


~Day 2~ 
Caramelized Onions, Cream Cheese, American, Cheddar and Mozzarella on Whole Wheat


~Day 3 ~ 
Cheddar Cheese, Bacon and Fresh Pineapple on Potato Bread...Hawaii Throw Back


~Day 4 ~ 
Mediterranean Grilled Cheese with Feta Cheese, Roasted Red Peppers 
and Spinach on Vienna Bread


~ Day 5 ~
Turkey Club with Bacon, Avocado, Tomato and American Cheese on Whole Wheat Potato


~ Day 6 ~ 
Quesadilla Grilled Cheese with Avocado, Cheddar Cheese, Tomato, Cilantro, 
Hot Pepper Relish and Cholula on a Multi grain Wrap


~ Day 7 ~
 Pizza Grilled Cheese with Ricotta, Parmagiana , Mozzarella, Provolone and Pepperoni 
on Italian Bread with a side of homemade marinara sauce


~ Day 8 ~ 
Grilled Cheese with Cheddar, Bacon and Apple Slices


~ Day 9 ~
Muffelatta inspired Grilled Cheese with Pepper Ham, Salami, Provolone, 
Green Olive Tapenade and Roasted Red Peppers on Onion Rye


~ Day 10 ~ 
Grilled Cheese with Spinach, Artichokes, Provolone and Asiago Cheese on
  Whole Wheat Potato Bread


~ Day 11 ~ 
Grilled Cheese with Swiss Cheese and Ham on Onion Rye with Coarse Ground Mustard


~ Day 12 ~
 Cuban inspired Grilled Cheese with Ham, Cheddar, Green Olives on Italian Bread
My favorite grilled cheese!


~ Day 13 ~ 
Veggie Grilled Cheese with Feta, Avocado, Roasted Red Peppers and 
Hummus on Italian Bread


 ~ Day 14~ 
Buffalo Chicken Grilled Cheese with Shredded Chicken, Frank's Red Hot, 
Cheddar and Blue Cheese Crumbles


~ Day 15~ 
Jalapeno Popper Grilled Cheese with Cheddar, Cream Cheese, 
Chipotle Gouda and Fresh Jalapenos


~ Day 16 ~ 
Caprese Grilled Cheese with Fresh Mozzarella, Tomatoes, Fresh Basil and
 Balsamic Drizzle on Italian Bread


~ Day 17~
Loaded Baked Potato Grilled Cheese with Homemade Sour Cream Mashed Potatoes,
Cheddar Cheese and Bacon


~ Day 18~ 
Chicken Ranch Grilled Cheese with Sauteed Red Onions, Cheddar Cheese,
Ranch Dressing and Bacon on Rye


~ Day 19 ~
BBQ Chicken Grilled Cheese with Cheddar Cheese and Sweet Baby Ray's


~ Day 20 ~ 
Mac n' Cheese Grilled Cheese with Chipotle Gouda and Swiss Cheese


~ Day 21 ~ 
Loose Meat Grilled Cheese with Sauteed Onions and Mushrooms, Ground Beef, 
5 Cheese Beschamel Sauce, topped with Chipotle Gouda and Mayo
This was my husband's favorite. Kinda tasted like hamburger helper!


~ Day 22 ~
 Grilled Cheese with Homemade Pesto, Tomato and Four Cheese Blend on Italian Bread


~ Day 23 ~ 
Reuben Grilled Cheese with Roasted Turkey, Sauerkraut,
Homemade Thousand Island Dressing and Swiss Cheese on Marble Rye


~Day 24 ~
Pulled Pork Grilled Cheese with Pepper Jack and 4 Blend Cheese on Multi grain Whole Wheat


~Day 25~ 
Grilled Cheese with Fresh Strawberries, Brie, Bacon Crumbles and Honey on Wheat Bread


~ Day 26 ~ 
Grilled Cheese with Tiramisu Marscapone, Fresh Raspberries and
Dark Chocolate Ganache on Sweet Bread
My favorite dessert one!


~ Day 27~
Grilled Cheese with Cream Cheese, Peanut Butter and Chocolate Chips on Sweet Bread


~ Day 28~
 Grilled Cheese with Marscapone and Ricotta Cannoli Filling with
Chocolate Chips on Sweet Bread


~Day 29~ 
Grilled Cheese with Goat Cheese, Noni's Homemade Peach Preserves and 
Brown Sugar on Sweet Bread


~ Day 30 ~
 Grilled Cheese with Goat Cheese, Nutella and Banana Slices on Sweet Bread
This was my husband's favorite dessert one!

I didn't include any recipes for these since I figured they're all pretty self explanatory. But if you want to know anything more about assembly or ingredients, just ask! The most important tip I can offer when it comes to grilled cheese is to thoroughly butter your pan. Do not use a cooking spray! I have to give my husband credit for this technique. Take a stick of butter and unwrap a little bit of one end. Use it directly on the pan, which should be at medium low, to evenly and lightly coat it with the perfect amount of butter. Always repeat before flipping to get a nice toasty brown top and bottom. If you have a thick sandwich, you may want to put some weight on it using a plate.  If the cheese is not as "melty" as you would like, just pop it in the microwave for about ten seconds. Just don't burn your grilled cheese and take pictures of it then post them on instagram.

You're Welcome.