Showing posts with label blueberry. Show all posts

Tuesday, August 19, 2014

A Berry Delicious Pie

I forgot how much I love pie. The only time I eat and sometimes even make it is at which happens to be my all time favorite holiday. I also forgot how much I love making pies. Most people probably buy the pre made frozen pie crust but don't realize how much better a homemade one is. Yes, it can be a bit of a pain in the ass and is an extra step but how impressive is it to be able to present a perfectly crimped pie crust that tastes even better than it looks.
Thanksgiving...

I got my pie baking skills...sorry in advance mom...from cooking class in high school. My teacher was a bit of a Martha Stewart meets Hitler.  We had to do over our crusts til we got it right. Luckily it didn't take me too long and I became pretty good at it...until I met my husband. He's a bit of a perfectionist and he would definitely beat out my pie primping skills, after a few tedious hours of getting it just right. :)

So I had all these berries...some were fresh, some were frozen. I was supposed to make jelly but just never got around to it, plus my Noni keeps giving me hers so why make my own!  I've been thinking about pie since the summer. Everyday I would pass a Sixpence Pie Company and never got the chance to go in. Got some good berries from the grocery store on sale, so those mixed with the ones I froze a few weeks earlier will be my quadruple berry pie...strawberries, blueberries, blackberries and raspberries. I just love berries, especially since I'm allergic to mostly every other fruit that has skin.

This is a super easy recipe so taking the extra step to make the pie crust is definitely doable. And it only takes 4 ingredients and a little bit of elbow grease.


Four Berry Pie

Makes one 9 inch lattice top pie

Pie crust:
  • 2 1/3 cups all purpose unbleached flour
  • 1 1/2 sticks of butter, salted
  • 2 tsp sugar
  • 8-10 teaspoons ice water 
Combine your flour and sugar in a bowl. Cut up your sticks of butter into smaller chunks. They should be almost right out of the fridge, not softened!


Using a pastry cutter, "cut" your butter into the flour until it is broken down into pea sized bits. The mixture should be crumbly. If you don't have a pastry cutter, you can also use a fork or even your food processor. I like to get my hands directly in the dough so I can feel how big the chunks of butter are...not too big, not too small. This is the most important part in making a light and flaky pie crust!


When you have your desired consistency, slowly add a few teaspoons of water at a time and incorporate into your flour. As soon as the dough begins to stick together, dump it out on a large wooden board and form your balls!


I separated mine into two, one larger for the crust and one smaller for the lattice top. Secure in saran wrap and refrigerate for about 20 minutes while you prep the filling.


Filling:
  • 5 cups berries...I think I used about 2 cups of strawberries, 1 1/2 cups blueberries and maybe 3/4 cup each of raspberries and blackberries. I'm terrible with measuring but amazing when it comes to "eyeing it."
  • 1/2 cup flour... I altered this from the original recipe in my trusty ole Betty Crocker cookbook since I used more strawberries. They have a bit more moisture so I increased the flour.
  • 3/4 cup sugar
  • Sprinkle of cinnamon
  • Juice of half a lemon
Now throw all your ingredients in a bowl and combine. That's it!  Back to the pie dough...


Assembly:

Preheat your oven to 375 degrees.

When you're ready to put your pie together, place your dough on a lightly floured wooden board. Flour up your rolling pin. Roll out your dough, constantly rotating it to get a nice size circle. Your dough should be about 1/4 inch thick. Use your pie dish to help figure out if the circle is big enough.


 To transfer your dough to the pie dish, roll it up half way around your rolling pin. Carefully hover over your dish and unroll it. Although I love ceramic dishes since they're so pretty, I use a glass one because you can see through the bottom and check how done your pie is.


Gently push the edges into the bottom of the pie dish. Trim off excess leaving about 1/2 inch hanging over the edge of the dish. Save the scraps for later!

Fold and tuck it underneath to give it smooth edge. Then crimp away! One thumb should be on the inside part of the crust and your opposing thumb and pointer finger should be on the outside.  Gently push them towards each other making an indent in the dough, all the way around the pie. I tend to do it at a little bit of angle.


Use a fork to poke some holes in the bottom of your crust. This will allow any steam to escape and result in a cooked bottom instead of a soggy one.

Dump your filling in the crust and spread around evenly.

Roll out your second pie crust for the lattice top. I have a neat little cutter I use to make a nice edge but a pizza cutter works too! I cut mine about 1 inch thick.


Lay about 4 or 5 of them across the top of your pie. You want to weave the other ones in the opposite direction, alternating over/under.

Trim off the excess and fold and tuck the edges into the crust the best you can.

To get a nice golden top, you can brush it with milk or an egg wash. Sprinkle a little bit of cinnamon and sugar on top if you'd like and pop it in the oven with a pan underneath to catch drippings.


I leave the crust uncovered for the first twenty minutes, then wrap it in foil so it doesn't burn. I peak on it constantly and remove the foil towards the end of baking. I also bumped up the temp to 400 degrees after about 40 minutes. Baking times will vary but that's why it helps to have a glass bottom dish.  You want a light golden top.

Oh and those scraps from the pie crust! Sprinkle with some cinnamon and sugar and throw on a cookie sheet and bake too! Put them on ice cream or just eat as they are!


The only thing this pie is missing is whipped cream...

While it's baking, whip up some fresh whipped cream. I use my hand held immersion blender or my kitchen aid...about a cup of heavy cream and a cup or so of powdered sugar with a squirt of vanilla.


You're Welcome.

Monday, May 12, 2014

A Mother's Day Miracle...

So unfortunately, I have barely any pictures to go along with this post. I swear I should just have a camera recording in my kitchen at all times. I make lots and lots of meals, usually in a matter of minutes, scarf it down thinking how good it tastes then realize... wow, that was delicious, other people need to eat this... then Shit! I didn't take any pictures! 

I do have a legitimate excuse for this because I was cooking for non other than... my in-laws. I was a bit of a crazy person that morning and didn't even have a chance to drink a Bloody Mary, my all time favorite any time of day drink.  But I did cook a bangin' ass breakfast after drinking about 5 cups of coffee.

There was seven of us total and everything came out excellent, on time and most importantly hot! We all sat at a set table complete with flowers and vintage floral table cloth napkins freshly purchased from XOVintage. Right next to the baby chickens, which are currently renting a space in our dining room while they await the construction of their beautiful new coop!  But anyways, it was a miracle to get all of us together, for more than an hour to sit down to a homemade meal, not purchased or made by the guest of honor, my mother-in-law.


~The Menu~

Nutella and Brie &
Peach Preserves and Brie
Breakfast Croissants

Scrambled Eggs and Cheese

Slow Cooker French Toast 

Homemade Waffles with Fresh Blueberry Sauce

Buffalo Home Fries

Bacon and Sausage

Lemon Meringue Cupcakes

Chocolate Mousse Cupcakes


In addition, my brother in law made some mini quiches in wonton wrappers which were really yummy and my mother-in-law brought fresh strawberries and made creamy marshmallow dip and Eclair Cake. Yep, we're Italian.


Breakfast Croissants:
Makes 16
  • One container of Pillsbury Crescent Rolls
  • Whatever filling your little heart desires...in this case, it was a schmear of Nutella and a dollop of Brie in one batch and a scoop of Peach Preserves and Brie in the other

I prepped these the night before so I was able to just pop em in the oven the next day. 

Preheat oven to 350. Line a pan with parchment paper for easy cleanup. 
Assemble croissants and give it your best attempt to make it look like they do on the package. But don't worry, because they probably won't!

Bake for about 10 minutes or until lightly golden brown. They might ooze out a little but it's just more dipping for your croissant! Serve immediately.


Slow Cooker French Toast:
Serves about ten


  • One loaf of any old bread. Yes, literally any old bread. I prefer a heartier bread that can handle soaking up all the eggs and milk. I  go to the "day old" baked goods section of the grocery store.
  • 8 eggs
  • 2 1/2 cups of milk
  • Half a stick of butter
  • 1 Tbs cinnamon
  • 2 Tbs vanilla
  • 1/4 brown sugar
The night before you plan to serve this, spray your beloved crock pot with some cooking oil. I forgot to do this step so my pot will be soaking for the next few days or even weeks.  

Layer your bread in the crock pot.  

Combine the eggs, milk, cinnamon, vanilla and brown sugar in a mixing bowl. Add the brown sugar.

Pour over the bread. Use your hands to make sure all the bread is soaked. Cut up your stick of butter into chunks and throw it in too.

Cook all night on low temp. Don't cook more than 7 hours or it may burn, depending on your crock pot. If you have one with a timer, I'm jealous.

Serve warm with real maple syrup. Any maybe some more brown sugar.


Homemade Waffles with Blueberry Sauce
Makes about 10-12 waffles

  • 1 3/4 cup flour
  • 2 Tbs sugar
  • 1 Tbs baking powder
  • 2 eggs
  • 1 3/4 cup milk
  • 1/2 cup vegetable oil
  • 1 tsp vanilla
I prepped the dry ingredients the night before so all I had to do was add the wet in the morning...and ask my mother in law to bring more eggs because we used the rest.

Combine the flour, sugar and baking powder in a bowl. 

In a separate bowl, combine your milk, eggs, vanilla and oil. Add this to the flour mixture.

You know the rest. I am assuming you know how to use your waffle iron.

Blueberry Sauce:
In a small saucepan, cook about a pint of blueberries over medium heat. Add about 3 teaspoons of sugar. When the blueberries start to break down and there is a good amount of liquid, add 1/2 teaspoon of cornstarch.  Should take about 8-10 minutes. If it seems to be too thick, you can a tiny bit of water. Keep stirring until it is the consistency you want.

Serve on waffles and/or eat out of the bowl.

Buffalo Home Fries:    
Already blogged! Ooooh a photo!

Lemon Meringue Cupcakes:
Makes 12
For Cupcakes...
  • 1/2 cup cake flour
  • 1/2 cup King Arthur's unbleached All Purpose Flour
  • 1 tsp baking powder
  • 1/2 tsp baking soda
  • 1 tsp lemon zest
  • 2 eggs
  • 3/4 cup of sugar
  • 1 1/2 tsp real lemon extract 
  • 1/2 cup oil
  • 1/2 cup buttermilk (or 1 tsp vinegar, fill up to 1/2 cup with milk)
Preheat oven to 360. Yes, this sounds strange but for my oven it works perfectly! 

In a medium bowl, combine flours, baking soda, baking powder and lemon zest. 

In a stand mixer, beat the eggs. Add the sugar then oil. Add lemon extract. 

On a slow speed, alternate adding the flour mixture and buttermilk. I always scrape the bottom of the bowl to make sure everything has been incorporated. 

Fill cupcake liners 2/3 of the way and bake for about 18 minutes or until edges are just turning golden brown. Set aside to cool.

For Filling...

Make a package of lemon pudding pie filling according to directions on the box. I would never normally use this if I were selling these but I knew for certain it would taste good. It's the way my Noni does lemon meringue pie and I made the cupcakes for her. And I had no time to experiment and play around.  The in-laws were coming...

For Meringue Topping...

This was also on the box of the lemon pie pudding filling!  Over a double boiler on low heat, beat three room temperature egg whites and 1/4 cup of sugar. Add 1/4 tsp cream of tartar. I use my emulsion blender attachment for this.

Beat for about 10 minutes and egg whites are white and frothy. I also add this to my Kitchen Aide mixer with the whisk attachment for extra fluffiness.

Assembly...

Cut out the centers of your cooled cupcakes with a smooth edged sharp knife. Kinda like a cone shape. Fill your cupcake with about a teaspoon of lemon filling.  Use a star tip and pastry bag to pipe on your frosting. Then whip out your blow torch and make a toasty top.


Chocolate Mousse Cupcakes:
Makes 12

For the Cupcakes...

  • 1 cup flour
  • 2 eggs
  • 1/2 cup cocoa powder
  • 6 Tbs butter
  • 1/2 tsp baking soda
  • 1/2 tsp baking power
  • 1 cup sugar
  • 1 tsp vanilla
  • 3/4 cup milk
Preheat oven to 350.

Using the stand mixer, cream the butter and sugar together.

In a separate bowl, combine your flour, baking powder, baking soda and cocoa powder.

Add your eggs and vanilla to the creamed butter and sugar. Scrape the bowls to make sure everything is incorporated.

Slowly add you flour mixture and milk alternating each one at a time.

Beat until ingredients are just blended.

Fill cupcake liners 2/3 of the way. I always use my ice cream scooper. 

Bake about 18 minutes or until a toothpick comes out clean.

For the Filling...
Whip about 1/2 cup of heavy whipping cream in a mixer until thick and smooth. Put in fridge for later.
In a microwave safe bowl, melt 4 oz of semi sweet chocolate chips and about 2 tsp of heavy cream. 
Let cool about 5 minutes. Add a heaping spoonful of whipped cream to the chocolate and gently stir. Add the remainder of the whipped cream and fold carefully into the chocolate. Refrigerate until ready to use.

For the Frosting...
Follow the directions on the back of the Hershey's Cocoa Powder box. Seriously, it's the best chocolate frosting ever.  Melt a stick of butter. Add 2/3 cup of cocoa powder and stir. Dump in a mixing bowl and add about 3 cups of powdered sugar, one cup at a time, along with 1/4 cup of milk. You may need to adjust according to the consistency you want.

Assembly...
Cut out the middle of the cupcake with a smooth sharp knife. Pop the middle in your mouth. Use a spoon or pastry bag to fill the cupcakes with the mousse. Use a fancier tip and pastry bag to frost. top with a raspberry. Indulge.


You're Welcome.


Thursday, February 27, 2014

Save the 'Nanas!

I went grocery shopping the last weekend. On a Sunday. Around noon. Worst. Time. Ever.  Normally, I would ask my husband to come with me but knowing what madness lie ahead, I decided it wasn't the best idea. He likes to wander aimlessly through the aisles with me tossing the hand held scanner as high as he can in the air...not as productive as I need him to be sometimes ;)

I know exactly what I need and have repeated the list in my head over and over so I can navigate through the store as quickly as I can.  I find whatever spot I can, grab my bags and rush inside ready for battle. Produce is always the first stop. Bananas. I need bananas. The only fruit I can get my husband to eat because you can put peanut butter on it. And chocolate...and sprinkles.

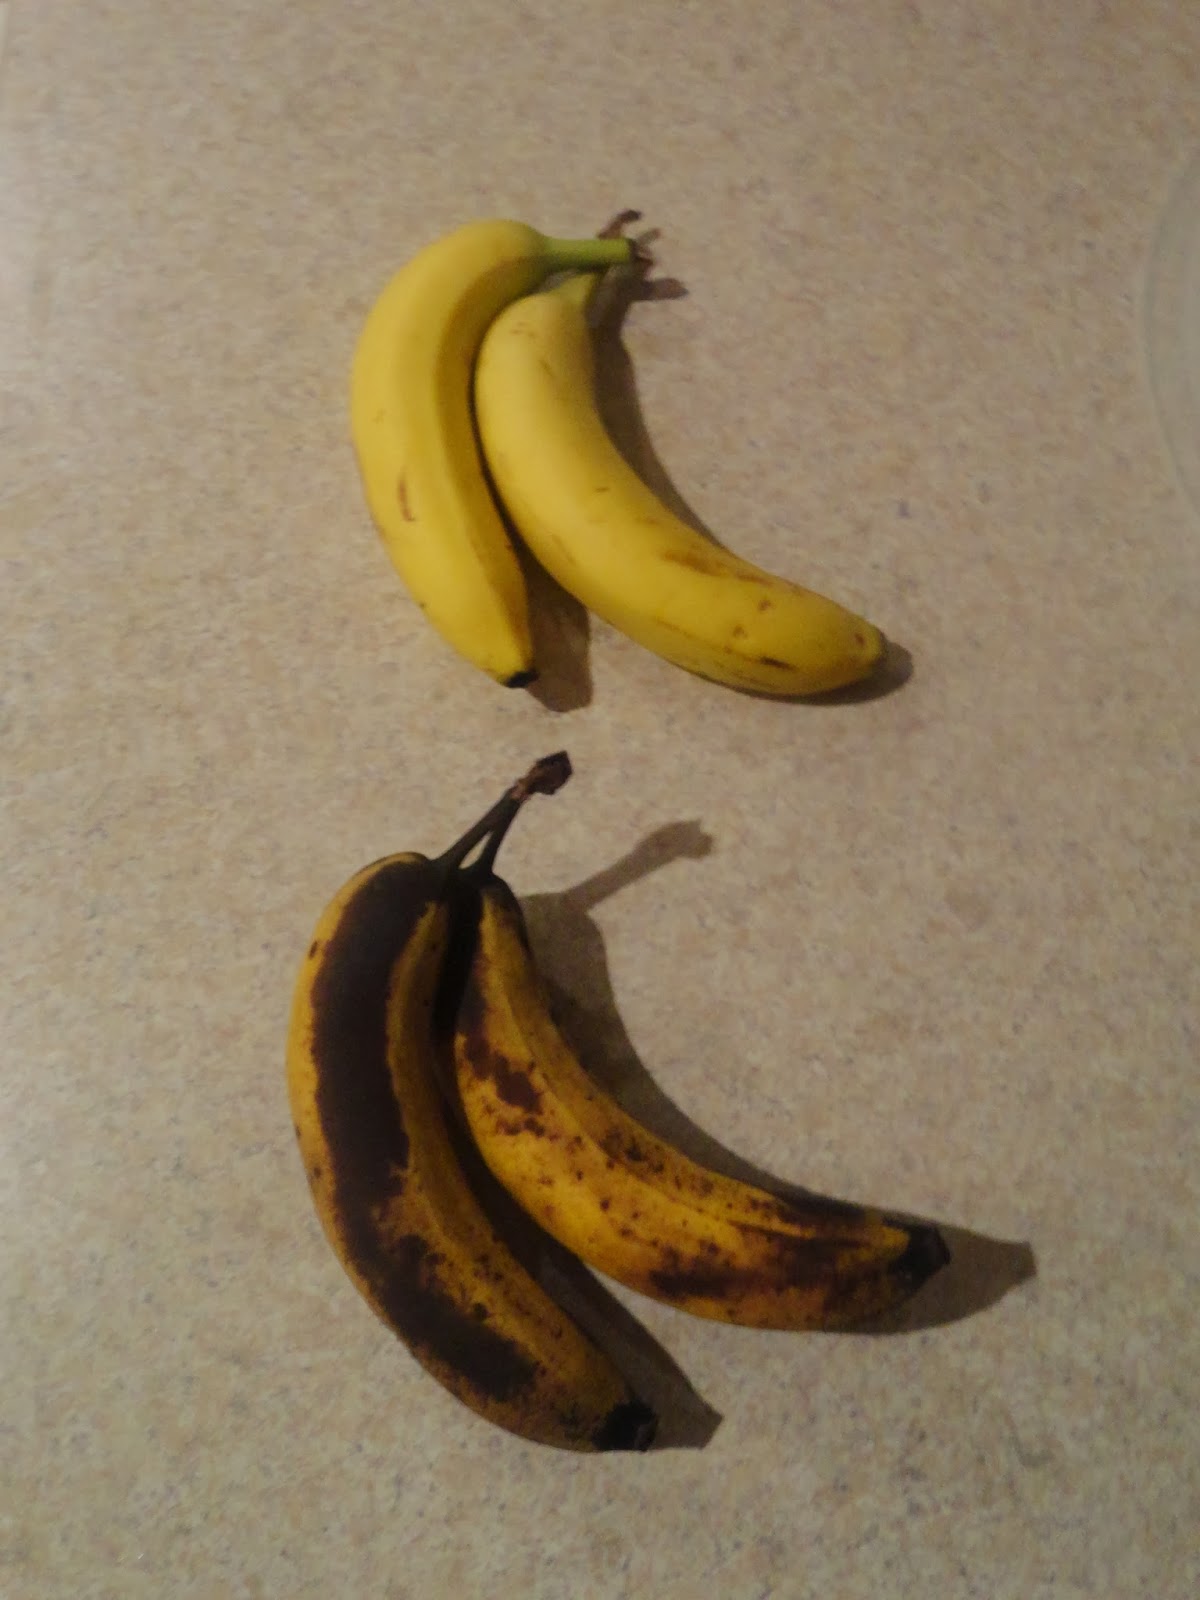
Of course I go the store after the mad rush of people and there's hardly any left and the ones that are, are all bright green.  I buy them anyways since, eventually they will ripen and turn yellow. Right?  Four days later, they are mostly dark brown. Never turned the slightest shade of yellow...just brown. But, I do not throw them away.  Most people would immediately put them in the garbage but I see it as baking opportunity.

Yellow is for eating. Black is for baking. :) 

I say the darker the better. When it comes to baking with bananas, they should be overripe. Yes, those ugly bananas with their black spots and all make THE perfect banana flavor to bake with.  First thought was to make the Banana Cake with cream cheese frosting covered in toasted pecans that I made for Thanksgiving.  I have no cream cheese and this cake MUST be made with cream cheese frosting just cuz it tastes so good.  Next...banana muffins.  I never eat breakfast and my husband is constantly running around at work so doesn't have time to eat. Banana muffins will be perfect and last through the week.


Banana Muffins
Makes 12 regular sized muffins 
or 36 minis
adapted from Ms. Betty C

1 3/4 cup flour
1/2 cup sugar
2 tps baking powder
1 tsp baking soda
2-3 overripe bananas, mashed
1/4 vegetable oil
3/4 milk
1 egg
1 tsp vanilla extract
*add nuts if you want

 Preheat oven to 350. Fill your baking pans with paper liners.

Combine flour, sugar, baking powder, and baking soda in a mixing bowl.

Combine oil and milk in a measuring cup. (*tip 1/4 + 3/4= 1 cup of liquid. no need for separate measuring cups!)  Add the vanilla and egg.  Whisk until incorporated. Add mashed banana. 

Pour liquid ingredients into dry ingredients. Stir until just combined. DO NOT OVER MIX YOUR MUFFINS! *often over mixing a batter will result in a dense and dry product...like a brick.

Scoop into liners 2/3 of the way. I topped mine with a little cinnamon and sugar, which I keep already mixed in a container in my baking cabinet. Bake until the edges are just golden brown. Did I mention I never use timers either...unless it's brownies. I always screw up baking brownies.
 

These muffins rise so nicely and came out just moist enough. The original recipe had WAY less sugar which is why I upped it to 1/2 cup but that still may not be sweet enough for your taste buds. It wasn't for my husband, but he still ate them.  If you like a sweet muffin like from the store, you may want to add more sugar probably about 1 cup.
 
If you don't eat all your muffins, give them away... Sharing is caring! Or you can throw them in the freezer and take them out as you want to eat them. On the subject if freezing...unfortunately, ready to bake bananas do not work well frozen. I mashed some up once and put them in a container in the freezer hoping I could use them the following week, but they turned all black and gross. Fail. 

So save your 'nanas! Banana Bread! Banana Muffins! Banana Pancakes! Banana Shakes!

You can also make Blueberry Muffins...
Omit the bananas. Add 1 pint of fresh blueberries, replace vanilla with fresh lemon juice, add 2 tsp of finely chopped lemon rind. 

Or add Crumble Topping...
1/3 cup brown sugar, 2 TBS flour, 1 tsp cinnamon, 4 TBS butter. Use a pastry blender or a fork to combine all ingredients until crumbly. Sprinkle on muffins before baking.