Showing posts with label breakfast. Show all posts

Monday, May 12, 2014

A Mother's Day Miracle...

So unfortunately, I have barely any pictures to go along with this post. I swear I should just have a camera recording in my kitchen at all times. I make lots and lots of meals, usually in a matter of minutes, scarf it down thinking how good it tastes then realize... wow, that was delicious, other people need to eat this... then Shit! I didn't take any pictures! 

I do have a legitimate excuse for this because I was cooking for non other than... my in-laws. I was a bit of a crazy person that morning and didn't even have a chance to drink a Bloody Mary, my all time favorite any time of day drink.  But I did cook a bangin' ass breakfast after drinking about 5 cups of coffee.

There was seven of us total and everything came out excellent, on time and most importantly hot! We all sat at a set table complete with flowers and vintage floral table cloth napkins freshly purchased from XOVintage. Right next to the baby chickens, which are currently renting a space in our dining room while they await the construction of their beautiful new coop!  But anyways, it was a miracle to get all of us together, for more than an hour to sit down to a homemade meal, not purchased or made by the guest of honor, my mother-in-law.


~The Menu~

Nutella and Brie &
Peach Preserves and Brie
Breakfast Croissants

Scrambled Eggs and Cheese

Slow Cooker French Toast 

Homemade Waffles with Fresh Blueberry Sauce

Buffalo Home Fries

Bacon and Sausage

Lemon Meringue Cupcakes

Chocolate Mousse Cupcakes


In addition, my brother in law made some mini quiches in wonton wrappers which were really yummy and my mother-in-law brought fresh strawberries and made creamy marshmallow dip and Eclair Cake. Yep, we're Italian.


Breakfast Croissants:
Makes 16
  • One container of Pillsbury Crescent Rolls
  • Whatever filling your little heart desires...in this case, it was a schmear of Nutella and a dollop of Brie in one batch and a scoop of Peach Preserves and Brie in the other

I prepped these the night before so I was able to just pop em in the oven the next day. 

Preheat oven to 350. Line a pan with parchment paper for easy cleanup. 
Assemble croissants and give it your best attempt to make it look like they do on the package. But don't worry, because they probably won't!

Bake for about 10 minutes or until lightly golden brown. They might ooze out a little but it's just more dipping for your croissant! Serve immediately.


Slow Cooker French Toast:
Serves about ten


  • One loaf of any old bread. Yes, literally any old bread. I prefer a heartier bread that can handle soaking up all the eggs and milk. I  go to the "day old" baked goods section of the grocery store.
  • 8 eggs
  • 2 1/2 cups of milk
  • Half a stick of butter
  • 1 Tbs cinnamon
  • 2 Tbs vanilla
  • 1/4 brown sugar
The night before you plan to serve this, spray your beloved crock pot with some cooking oil. I forgot to do this step so my pot will be soaking for the next few days or even weeks.  

Layer your bread in the crock pot.  

Combine the eggs, milk, cinnamon, vanilla and brown sugar in a mixing bowl. Add the brown sugar.

Pour over the bread. Use your hands to make sure all the bread is soaked. Cut up your stick of butter into chunks and throw it in too.

Cook all night on low temp. Don't cook more than 7 hours or it may burn, depending on your crock pot. If you have one with a timer, I'm jealous.

Serve warm with real maple syrup. Any maybe some more brown sugar.


Homemade Waffles with Blueberry Sauce
Makes about 10-12 waffles

  • 1 3/4 cup flour
  • 2 Tbs sugar
  • 1 Tbs baking powder
  • 2 eggs
  • 1 3/4 cup milk
  • 1/2 cup vegetable oil
  • 1 tsp vanilla
I prepped the dry ingredients the night before so all I had to do was add the wet in the morning...and ask my mother in law to bring more eggs because we used the rest.

Combine the flour, sugar and baking powder in a bowl. 

In a separate bowl, combine your milk, eggs, vanilla and oil. Add this to the flour mixture.

You know the rest. I am assuming you know how to use your waffle iron.

Blueberry Sauce:
In a small saucepan, cook about a pint of blueberries over medium heat. Add about 3 teaspoons of sugar. When the blueberries start to break down and there is a good amount of liquid, add 1/2 teaspoon of cornstarch.  Should take about 8-10 minutes. If it seems to be too thick, you can a tiny bit of water. Keep stirring until it is the consistency you want.

Serve on waffles and/or eat out of the bowl.

Buffalo Home Fries:    
Already blogged! Ooooh a photo!

Lemon Meringue Cupcakes:
Makes 12
For Cupcakes...
  • 1/2 cup cake flour
  • 1/2 cup King Arthur's unbleached All Purpose Flour
  • 1 tsp baking powder
  • 1/2 tsp baking soda
  • 1 tsp lemon zest
  • 2 eggs
  • 3/4 cup of sugar
  • 1 1/2 tsp real lemon extract 
  • 1/2 cup oil
  • 1/2 cup buttermilk (or 1 tsp vinegar, fill up to 1/2 cup with milk)
Preheat oven to 360. Yes, this sounds strange but for my oven it works perfectly! 

In a medium bowl, combine flours, baking soda, baking powder and lemon zest. 

In a stand mixer, beat the eggs. Add the sugar then oil. Add lemon extract. 

On a slow speed, alternate adding the flour mixture and buttermilk. I always scrape the bottom of the bowl to make sure everything has been incorporated. 

Fill cupcake liners 2/3 of the way and bake for about 18 minutes or until edges are just turning golden brown. Set aside to cool.

For Filling...

Make a package of lemon pudding pie filling according to directions on the box. I would never normally use this if I were selling these but I knew for certain it would taste good. It's the way my Noni does lemon meringue pie and I made the cupcakes for her. And I had no time to experiment and play around.  The in-laws were coming...

For Meringue Topping...

This was also on the box of the lemon pie pudding filling!  Over a double boiler on low heat, beat three room temperature egg whites and 1/4 cup of sugar. Add 1/4 tsp cream of tartar. I use my emulsion blender attachment for this.

Beat for about 10 minutes and egg whites are white and frothy. I also add this to my Kitchen Aide mixer with the whisk attachment for extra fluffiness.

Assembly...

Cut out the centers of your cooled cupcakes with a smooth edged sharp knife. Kinda like a cone shape. Fill your cupcake with about a teaspoon of lemon filling.  Use a star tip and pastry bag to pipe on your frosting. Then whip out your blow torch and make a toasty top.


Chocolate Mousse Cupcakes:
Makes 12

For the Cupcakes...

  • 1 cup flour
  • 2 eggs
  • 1/2 cup cocoa powder
  • 6 Tbs butter
  • 1/2 tsp baking soda
  • 1/2 tsp baking power
  • 1 cup sugar
  • 1 tsp vanilla
  • 3/4 cup milk
Preheat oven to 350.

Using the stand mixer, cream the butter and sugar together.

In a separate bowl, combine your flour, baking powder, baking soda and cocoa powder.

Add your eggs and vanilla to the creamed butter and sugar. Scrape the bowls to make sure everything is incorporated.

Slowly add you flour mixture and milk alternating each one at a time.

Beat until ingredients are just blended.

Fill cupcake liners 2/3 of the way. I always use my ice cream scooper. 

Bake about 18 minutes or until a toothpick comes out clean.

For the Filling...
Whip about 1/2 cup of heavy whipping cream in a mixer until thick and smooth. Put in fridge for later.
In a microwave safe bowl, melt 4 oz of semi sweet chocolate chips and about 2 tsp of heavy cream. 
Let cool about 5 minutes. Add a heaping spoonful of whipped cream to the chocolate and gently stir. Add the remainder of the whipped cream and fold carefully into the chocolate. Refrigerate until ready to use.

For the Frosting...
Follow the directions on the back of the Hershey's Cocoa Powder box. Seriously, it's the best chocolate frosting ever.  Melt a stick of butter. Add 2/3 cup of cocoa powder and stir. Dump in a mixing bowl and add about 3 cups of powdered sugar, one cup at a time, along with 1/4 cup of milk. You may need to adjust according to the consistency you want.

Assembly...
Cut out the middle of the cupcake with a smooth sharp knife. Pop the middle in your mouth. Use a spoon or pastry bag to fill the cupcakes with the mousse. Use a fancier tip and pastry bag to frost. top with a raspberry. Indulge.


You're Welcome.


Sunday, March 30, 2014

What to do with an entire loaf of Monkey Bread.

I have never eaten or heard of Monkey Bread before I met my husband. Yep, I went 23 years without devouring a single piece of this cinnamony, sweet, mouthwatering, melt-in-your-mouth, buttery chunk of heaven. My mother in law is known for this delectable dish and when she makes it, it only lasts maybe a few hours, a day at the most. My husband and I once ate an entire bundt pan full in one weekend.

We are lucky enough to come from Italian families who like to cook and we like to eat. Our mothers are both incredibly hard working women who will stop at nothing to protect their families and still provide for them ...especially their favorite children, no matter how old we get...ehem...my husband and I.  On occasion, I find bags of goodies on our front door step. We always leave our mothers' houses with more than we came with. The last time, we received a whole loaf of monkey bread. This is a real thing.  I have no idea where she bought it but my mother in law somehow finds the most delicious little treats. It's not quite the same as a homemade one but pretty damn tasty, especially if it's made into french toast....and stuffed...with cream cheese....and fresh raspberry chutney...then smothered in syrup, from the one and only Mrs. Butterworth of course. Who's mom didn't make her talk and say "Good morning! Would you like some more syrup on your pancakes?"

What makes this recipe blogworthy is that I had all these ingredients ready to be thrown together in my fridge. I rarely go out and search for something a recipe calls for. Again, I "make-do." I had just baked some of my favorite Lemon Raspberry cupcakes and had leftover raspberry filling. I had cream cheese, my husband cannot live without it. And of course, the loaf of monkey bread.  Any these ingredients can be substituted. Regular bread can be used. Any filling you can think of can be used....peanut butter would be amazing! Even goat cheese! Figs! Your Noni's homemade jam! Or the one you bought off the shelf! Use whatever you have on hand. I'll just take credit for the idea.

Monkey Bread Stuffed French Toast
Makes 2 servings

2 eggs
8 slices of Monkey Bread
3/4 cup of milk
1/2 tsp vanilla
Cream Cheese, softened
Raspberry Filling (see recipe below or you can always use some jam)


Whisk together eggs, milk and vanilla.  Or do whatever you would normally do to make french toast.

Slice the loaf of bread into 8 pieces about 1/4 inch thick. (You'll have some leftover for another round of french toast the next day)

Heat your pan on medium heat and grease with some butter.

Meanwhile, prepare your "sandwiches."


Spread a layer of cream cheese on each slice

Spread some raspberry filling or your favorite jam on top of half the slices.

Smoosh together.

Carefully dip each one in the egg mixture. Be sure to drench it really well.

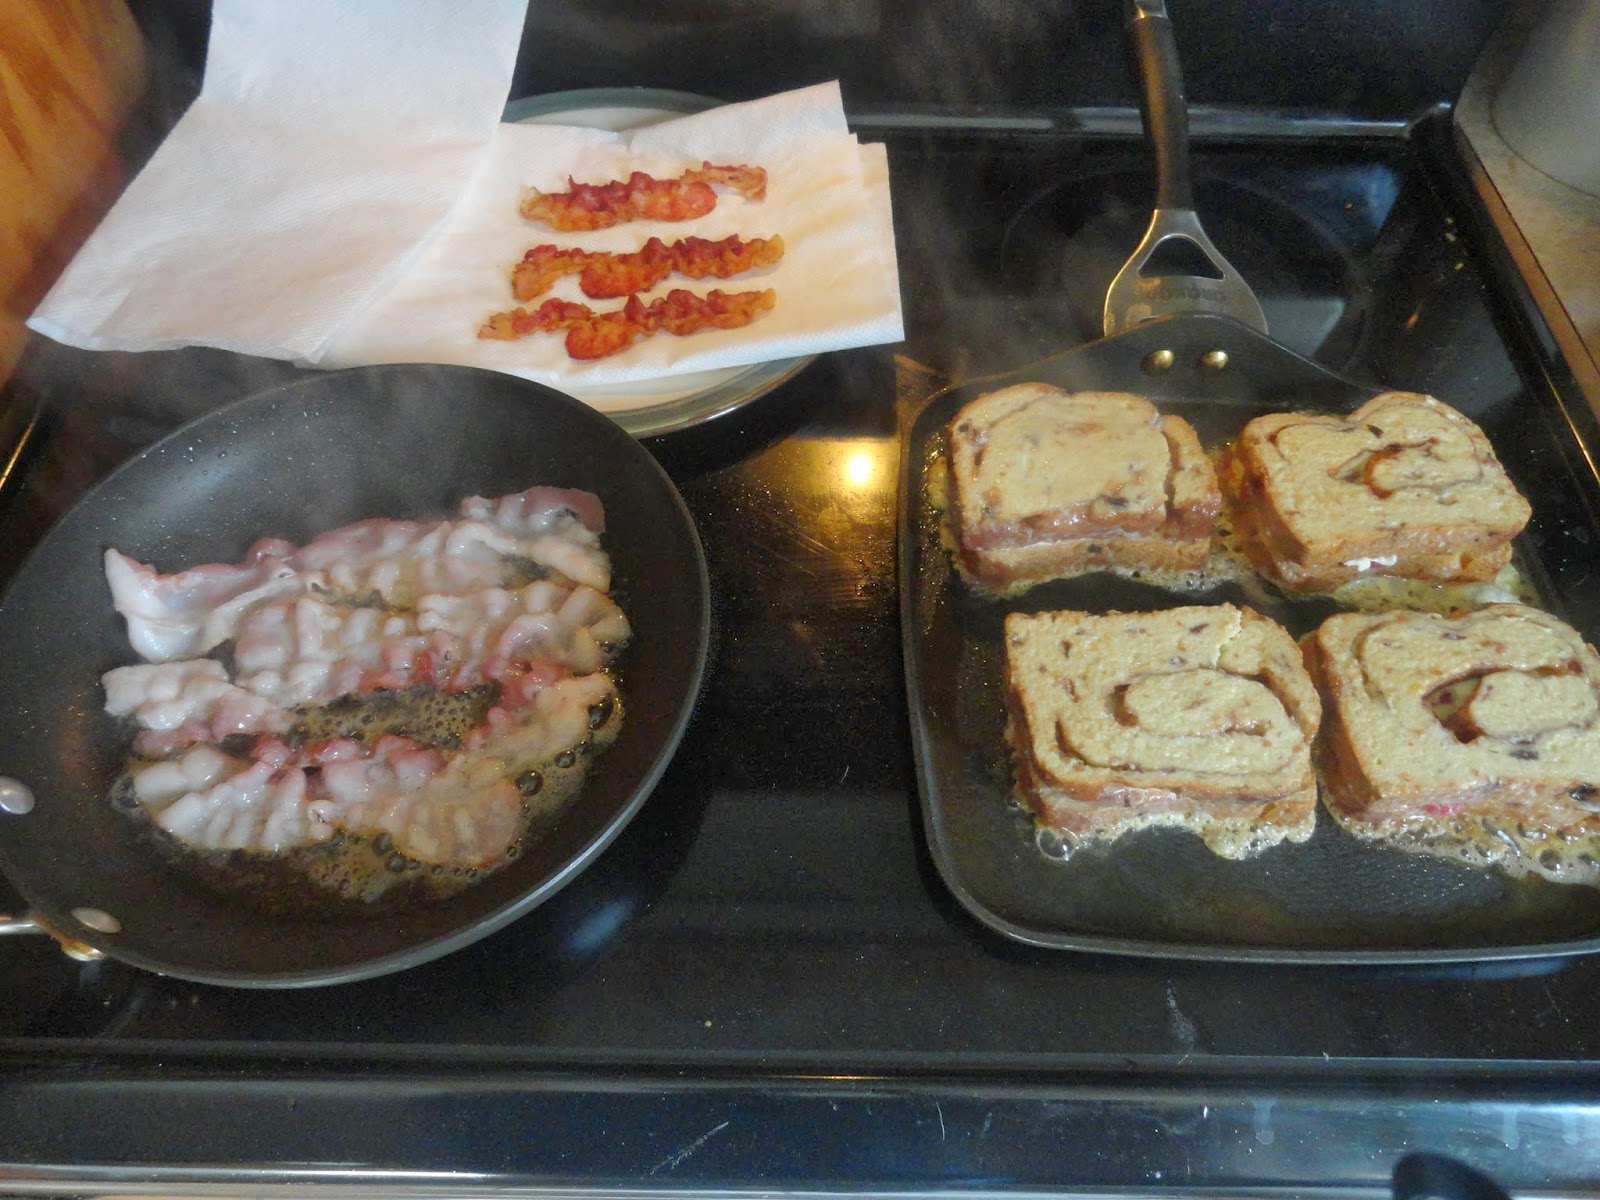
Place each one in the pan. Start your bacon. Yep, this needs some bacon. Doesn't every meal?
                  My husband is a pro at cooking bacon. Somehow we manage in our little kitchen.                         He only burned me once.


Because the french toast is a little thick, I noticed I maaay have cut mine into thicker than 1/4 inch...I used my panini pan top to put some weight on it so it would cook all the way through.


Cook on each side for about 3 minutes, meanwhile still cookin' up a bunch o' bacon.

When they're ready to eat, top with a coating of powdered sugar, slice in half and take pictures to make everyone jealous of what you just concocted.

Recipe for Raspberry Filling:

 All it requires is cooking down some raspberries, about a cup, with some sugar. In a saucepan on medium heat, bring to a simmer, raspberries and maybe less than 1/4 cup of sugar and some freshly squeezed lemon juice.  Once the raspberries break down, take one teaspoon of tapioca or cornstarch and mix with water. Add to the pan and cook for another 10 minutes. Let cool in the fridge until it is somewhat firm.  It'll last about 3 days or until you realize how good it tastes on almost anything...especially a spoon.


You're Welcome.

Saturday, March 15, 2014

The Potatoes Have Eyes...


potatoes-medium
Photo www.newlifeonahomestead.com
White potatoes have gotten a pretty bad reputation I feel like and honestly, I kinda miss eating them. They're known as being really starchy, filling and just not nutritionally beneficial to you. Sweet potatoes have become the only "good" potato....I personally LOVE sweet potatoes, especially with lots of brown sugar and butter! But how good can that be?  I recently bought some Russet potatoes because sometimes you just need a loaded baked potato with butter...and sour cream...and cheese...and bacon...and a lil broccoli. My plan was to cook a nice London Broil with a baked potato on the side. However, my husband's stomach decided to take a vacation from eating and feeling good, landing him in the emergency room two times in one week. His diet has consisted of bland, dairy free low carb, non fatty foods...served with a side of Nexium. So my "lowly" and lonely potatoes sat on the counter untouched and ignored for many days.

I hate wasting food, plus potatoes have a pretty good shelf life...until they start to grow eyes...those little green sprouts that begin to creep out of the skin (The photo is from another page I like, as I didn't take photos or expect to blog about old potatoes). Other people would probably look at them with disgust and toss them in the trash...sounds kinda like my Save the 'Nanas post. My husband wanted to put them in the garden but it being March, the ground is still frozen.  Me with my make do with what you have mentality said "Why don't we make home fries?! BUFFALO Home Fries!" Uh YES!  We love going out to breakfast and haven't been for some time. One of the places we go to has Buffalo Home Fries on the menu and they are AMAZING! I'm pretty confident I can make them at home just as good, if not better. My husband is finally feeling like he can eat real food again! I am so relieved to able to go back to normal with my cooking or even cooking at all!

I do have to give my husband credit for being the one to actually cook these up because my breakfast, as I have stated in previous posts, is coffee...with a side of more coffee. He is the one to cook breakfast 9 times out of 10.  But I have made these home fries before for him so I talk him through the steps as I drink my breakfast in front of the laptop.

Buffalo Home Fries
Makes about 2-3 servings

2 large Russet potatoes
Half of a white onion
Half a stick of butter
Olive oil
Frank's Red Hot Sauce
Paprika
Garlic Powder
Bacon

The potatoes have to be partially cooked before entering the pan. I have a handy little button on my microwave strictly for cooking potatoes. Pull off the eyes, pierce them with a fork a few times and pop em in for about 5 minutes. You want them to be somewhat soft but not completely cooked or else they will turn to smashed potatoes in your pan.

While the potatoes are cooking, heat a skillet on medium heat.

Dice your onions. As ridiculous as you will look and as silly as it sounds, wearing sunglasses while you chop onions usually helps prevent your eyes from watering. Add 2 TBS of butter to your pan. Add the onions.

When the potatoes are done, chop into chunks discarding any brown sections or parts that don't look good. Toss them in the pan with the onions.

While the potatoes and onions are cooking, make your bacon and set aside. I have a few different methods to cook bacon. My husband prefer the stove top way, but I kinda like the microwave method.
  1. Stove Top- Cook in a separate pan over medium heat, flipping a few times. Place on a paper towel to absorb excess grease.
  2. Broiler- On a tin foil lined pan, place strips of bacon under the broiler for about 8 minutes.
  3. Microwave- Line a microwaveable dish with a paper towel and place strips of bacon. Cover with another paper towel and microwave for about 3-4 minutes until bacon is crisp.
Add the rest of the butter to the pan of potatoes and put the heat on medium high. Drizzle some olive oil if the pan gets too dry. To get a nice crispiness to the potatoes the pan should be moist and on a higher heat. Toss and flip your potatoes often so they cook evenly on all sides.

Add some sprinkles of paprika and garlic powder, maybe about 1/4 tsp.  Squirt as much or as little hot sauce on the potatoes still in the pan. We likes things super spicy so I do about 10 shakes of the bottle then add more once they're on my plate.

My husband's breakfast
Once the potatoes are brown and crispy, crumble your bacon on top and serve with a side of Ken's Blue Cheese dressing...or Ranch works too.

I think potatoes will reenter my kitchen again. They really aren't all that bad for you and do have great health benefits...I mean they grown under the ground and absorb all kinds of nutrients from the soil. I kinda feel like I'm eating the Earth when I have a potato. Can't have them all the time with heavy toppings but there are sooooo many other things you can do with with them.

Instead of potato "flakes" make some real effing mashed potatoes!!!
My breakfast


Thursday, February 27, 2014

Save the 'Nanas!

I went grocery shopping the last weekend. On a Sunday. Around noon. Worst. Time. Ever.  Normally, I would ask my husband to come with me but knowing what madness lie ahead, I decided it wasn't the best idea. He likes to wander aimlessly through the aisles with me tossing the hand held scanner as high as he can in the air...not as productive as I need him to be sometimes ;)

I know exactly what I need and have repeated the list in my head over and over so I can navigate through the store as quickly as I can.  I find whatever spot I can, grab my bags and rush inside ready for battle. Produce is always the first stop. Bananas. I need bananas. The only fruit I can get my husband to eat because you can put peanut butter on it. And chocolate...and sprinkles.

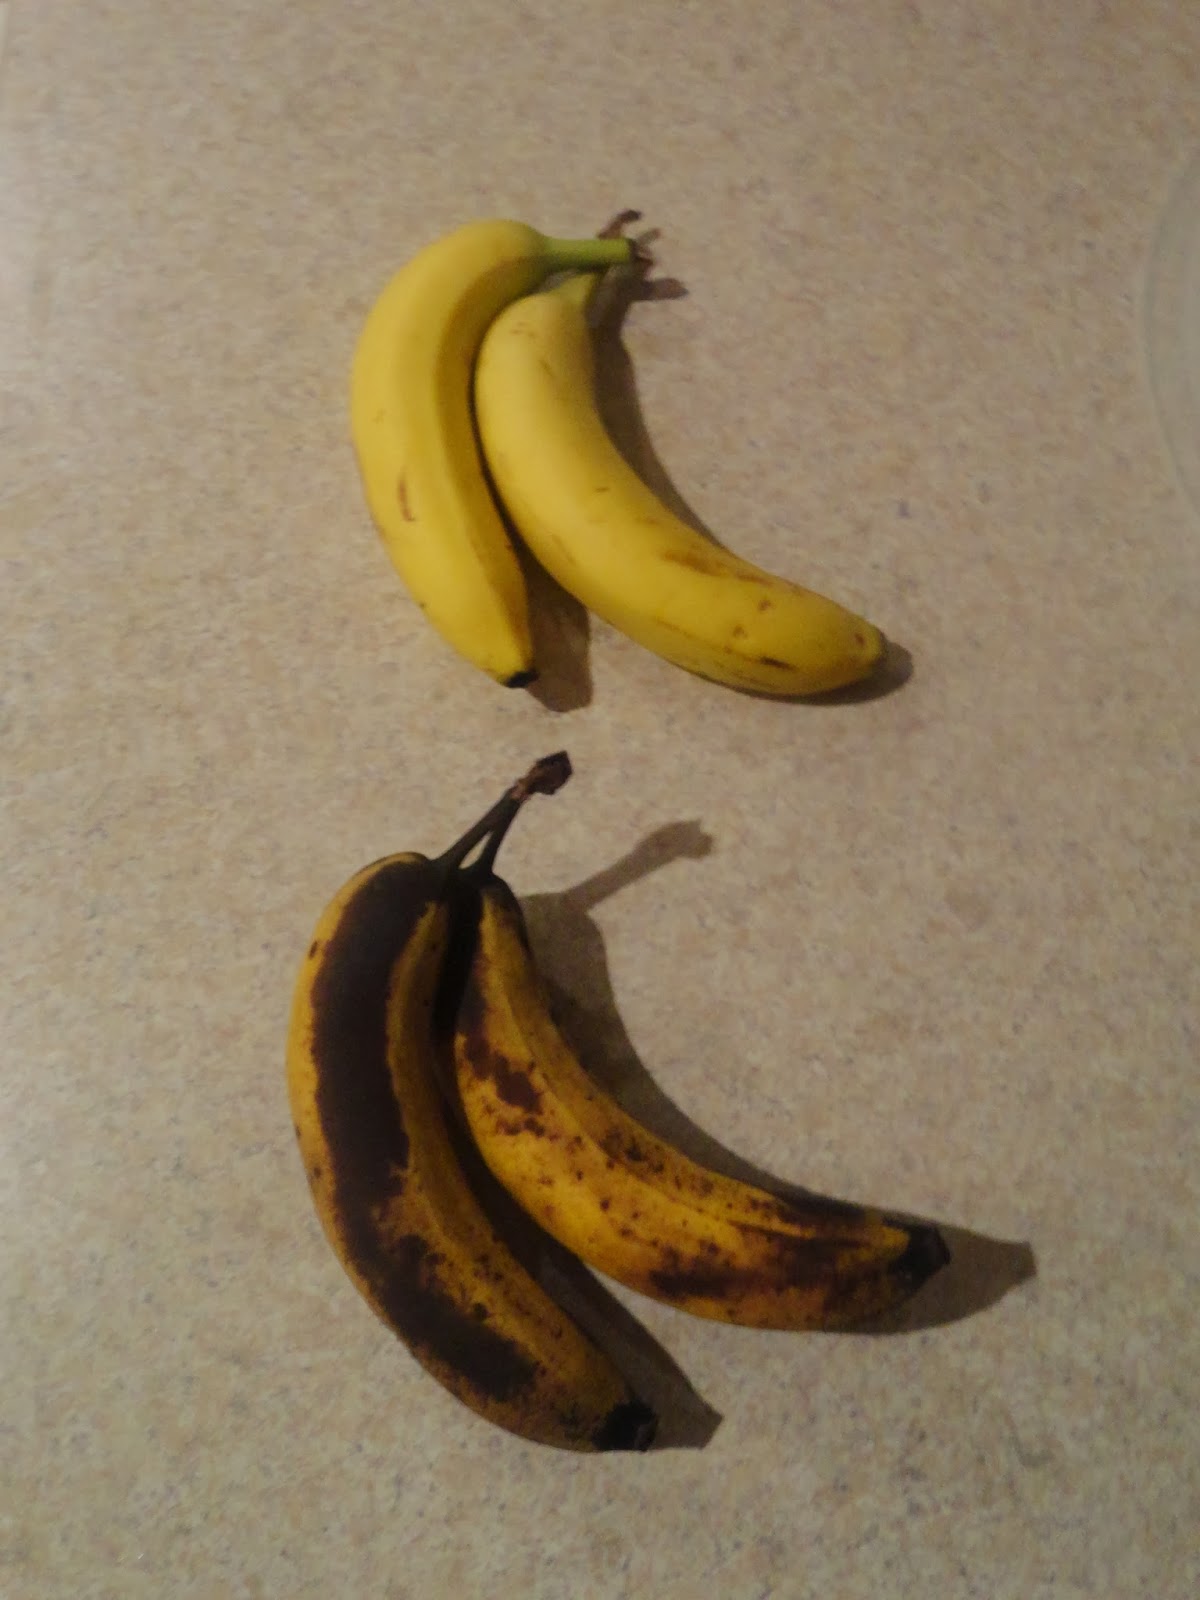
Of course I go the store after the mad rush of people and there's hardly any left and the ones that are, are all bright green.  I buy them anyways since, eventually they will ripen and turn yellow. Right?  Four days later, they are mostly dark brown. Never turned the slightest shade of yellow...just brown. But, I do not throw them away.  Most people would immediately put them in the garbage but I see it as baking opportunity.

Yellow is for eating. Black is for baking. :) 

I say the darker the better. When it comes to baking with bananas, they should be overripe. Yes, those ugly bananas with their black spots and all make THE perfect banana flavor to bake with.  First thought was to make the Banana Cake with cream cheese frosting covered in toasted pecans that I made for Thanksgiving.  I have no cream cheese and this cake MUST be made with cream cheese frosting just cuz it tastes so good.  Next...banana muffins.  I never eat breakfast and my husband is constantly running around at work so doesn't have time to eat. Banana muffins will be perfect and last through the week.


Banana Muffins
Makes 12 regular sized muffins 
or 36 minis
adapted from Ms. Betty C

1 3/4 cup flour
1/2 cup sugar
2 tps baking powder
1 tsp baking soda
2-3 overripe bananas, mashed
1/4 vegetable oil
3/4 milk
1 egg
1 tsp vanilla extract
*add nuts if you want

 Preheat oven to 350. Fill your baking pans with paper liners.

Combine flour, sugar, baking powder, and baking soda in a mixing bowl.

Combine oil and milk in a measuring cup. (*tip 1/4 + 3/4= 1 cup of liquid. no need for separate measuring cups!)  Add the vanilla and egg.  Whisk until incorporated. Add mashed banana. 

Pour liquid ingredients into dry ingredients. Stir until just combined. DO NOT OVER MIX YOUR MUFFINS! *often over mixing a batter will result in a dense and dry product...like a brick.

Scoop into liners 2/3 of the way. I topped mine with a little cinnamon and sugar, which I keep already mixed in a container in my baking cabinet. Bake until the edges are just golden brown. Did I mention I never use timers either...unless it's brownies. I always screw up baking brownies.
 

These muffins rise so nicely and came out just moist enough. The original recipe had WAY less sugar which is why I upped it to 1/2 cup but that still may not be sweet enough for your taste buds. It wasn't for my husband, but he still ate them.  If you like a sweet muffin like from the store, you may want to add more sugar probably about 1 cup.
 
If you don't eat all your muffins, give them away... Sharing is caring! Or you can throw them in the freezer and take them out as you want to eat them. On the subject if freezing...unfortunately, ready to bake bananas do not work well frozen. I mashed some up once and put them in a container in the freezer hoping I could use them the following week, but they turned all black and gross. Fail. 

So save your 'nanas! Banana Bread! Banana Muffins! Banana Pancakes! Banana Shakes!

You can also make Blueberry Muffins...
Omit the bananas. Add 1 pint of fresh blueberries, replace vanilla with fresh lemon juice, add 2 tsp of finely chopped lemon rind. 

Or add Crumble Topping...
1/3 cup brown sugar, 2 TBS flour, 1 tsp cinnamon, 4 TBS butter. Use a pastry blender or a fork to combine all ingredients until crumbly. Sprinkle on muffins before baking.


Saturday, February 15, 2014

$#%t! There's No More Pancake Mix!?!

Here's a perfect example of how my meals come into being.  Yesterday was Valentine's Day. My husband is a hopeless romantic and I am not. He came home after a hard day at work with a card and chocolates and I got him...nothin'.  I guess I'm just not into the commercialism of the holiday.

This morning I said I would make it up to him by heart shaped pancakes. I never make breakfast by the way. I prefer my breakfast in liquid form with cream and sugar. I go to my cabinet and pull out the box of pancake mix. Yes, there are a few things I will buy premade, or accept if they are given to me by my shopoholic coupon wielding Noni.   There was about 1/2 cup of mix left, definitely not enough to feed my 220lb husband and I.  Most people's first reaction would be to immediately get into the car and drive to the nearest market to buy more pancake mix so you don't further dissappoint your significant other.  Me on the other hand, go to my ol' reliable Betty Crocker cookbook, which I "borrowed" from my mother-in-law years ago, and find a recipe for Buttermilk Pancakes.  Any home cook will have all the necessary ingredient for pancakes.  And fortunately for me, I made a crap load of cupcakes the day before and have lots of buttermilk left over.  But if you don't have buttermilk, no worries! Milk + Vinegar = Sour Milk aka Buttermilk. 

Here is the recipe adapted from Ms. Betty Crocker:

Buttermilk Pancakes
Makes about 12-15 pancakes

1 3/4 cups all purpose flour
2 TBS sugar
1 tsp vanilla
2  tsp baking powder
1/2 tsp baking soda
1 egg
2 cups buttermilk
3 TBS oil
* if you don't have buttermilk, substitute 1 2/3 cup milk plus 1/3 cup vinegar

Combine dry ingredients in a bowl. Combine wet ingredients in a separate bowl. Add wet to dry and mix until incorporated.  Batter should be smooth.


Heat pan on stove over medium heat.  I use my cupcake scooper and poured the batter into heart shapes. Once the sides bubble up, it's time to flip. I made the whole bowl of batter and kept them in the warmer of my oven till I was finished.


So I now have my heart shaped pancakes as promised one day short of Valentine's Day. I set the table, cook some sausages and all we need is the syrup. Syrup?! Where the hell is the syrup? I just made these awesome homemade pancakes and cannot find any syrup beside about 1/4 of inch left at the bottom of Mrs. Butterworth's apron. I do not believe Betty has a recipe for instant homemade syrup. We do have some trees in our yard we've always wanted to tap....so I immediately threw on my boots and jacket, drove to the nearest store and overpaid for a brand new bottle of Aunt Jemima. She's no young and spunky Butterworth but after the dust was wiped off she got the job done. Totally better than what would have come out of a box.