Sunday, March 30, 2014

What to do with an entire loaf of Monkey Bread.

I have never eaten or heard of Monkey Bread before I met my husband. Yep, I went 23 years without devouring a single piece of this cinnamony, sweet, mouthwatering, melt-in-your-mouth, buttery chunk of heaven. My mother in law is known for this delectable dish and when she makes it, it only lasts maybe a few hours, a day at the most. My husband and I once ate an entire bundt pan full in one weekend.

We are lucky enough to come from Italian families who like to cook and we like to eat. Our mothers are both incredibly hard working women who will stop at nothing to protect their families and still provide for them ...especially their favorite children, no matter how old we get...ehem...my husband and I.  On occasion, I find bags of goodies on our front door step. We always leave our mothers' houses with more than we came with. The last time, we received a whole loaf of monkey bread. This is a real thing.  I have no idea where she bought it but my mother in law somehow finds the most delicious little treats. It's not quite the same as a homemade one but pretty damn tasty, especially if it's made into french toast....and stuffed...with cream cheese....and fresh raspberry chutney...then smothered in syrup, from the one and only Mrs. Butterworth of course. Who's mom didn't make her talk and say "Good morning! Would you like some more syrup on your pancakes?"

What makes this recipe blogworthy is that I had all these ingredients ready to be thrown together in my fridge. I rarely go out and search for something a recipe calls for. Again, I "make-do." I had just baked some of my favorite Lemon Raspberry cupcakes and had leftover raspberry filling. I had cream cheese, my husband cannot live without it. And of course, the loaf of monkey bread.  Any these ingredients can be substituted. Regular bread can be used. Any filling you can think of can be used....peanut butter would be amazing! Even goat cheese! Figs! Your Noni's homemade jam! Or the one you bought off the shelf! Use whatever you have on hand. I'll just take credit for the idea.

Monkey Bread Stuffed French Toast
Makes 2 servings

2 eggs
8 slices of Monkey Bread
3/4 cup of milk
1/2 tsp vanilla
Cream Cheese, softened
Raspberry Filling (see recipe below or you can always use some jam)


Whisk together eggs, milk and vanilla.  Or do whatever you would normally do to make french toast.

Slice the loaf of bread into 8 pieces about 1/4 inch thick. (You'll have some leftover for another round of french toast the next day)

Heat your pan on medium heat and grease with some butter.

Meanwhile, prepare your "sandwiches."


Spread a layer of cream cheese on each slice

Spread some raspberry filling or your favorite jam on top of half the slices.

Smoosh together.

Carefully dip each one in the egg mixture. Be sure to drench it really well.

Place each one in the pan. Start your bacon. Yep, this needs some bacon. Doesn't every meal?
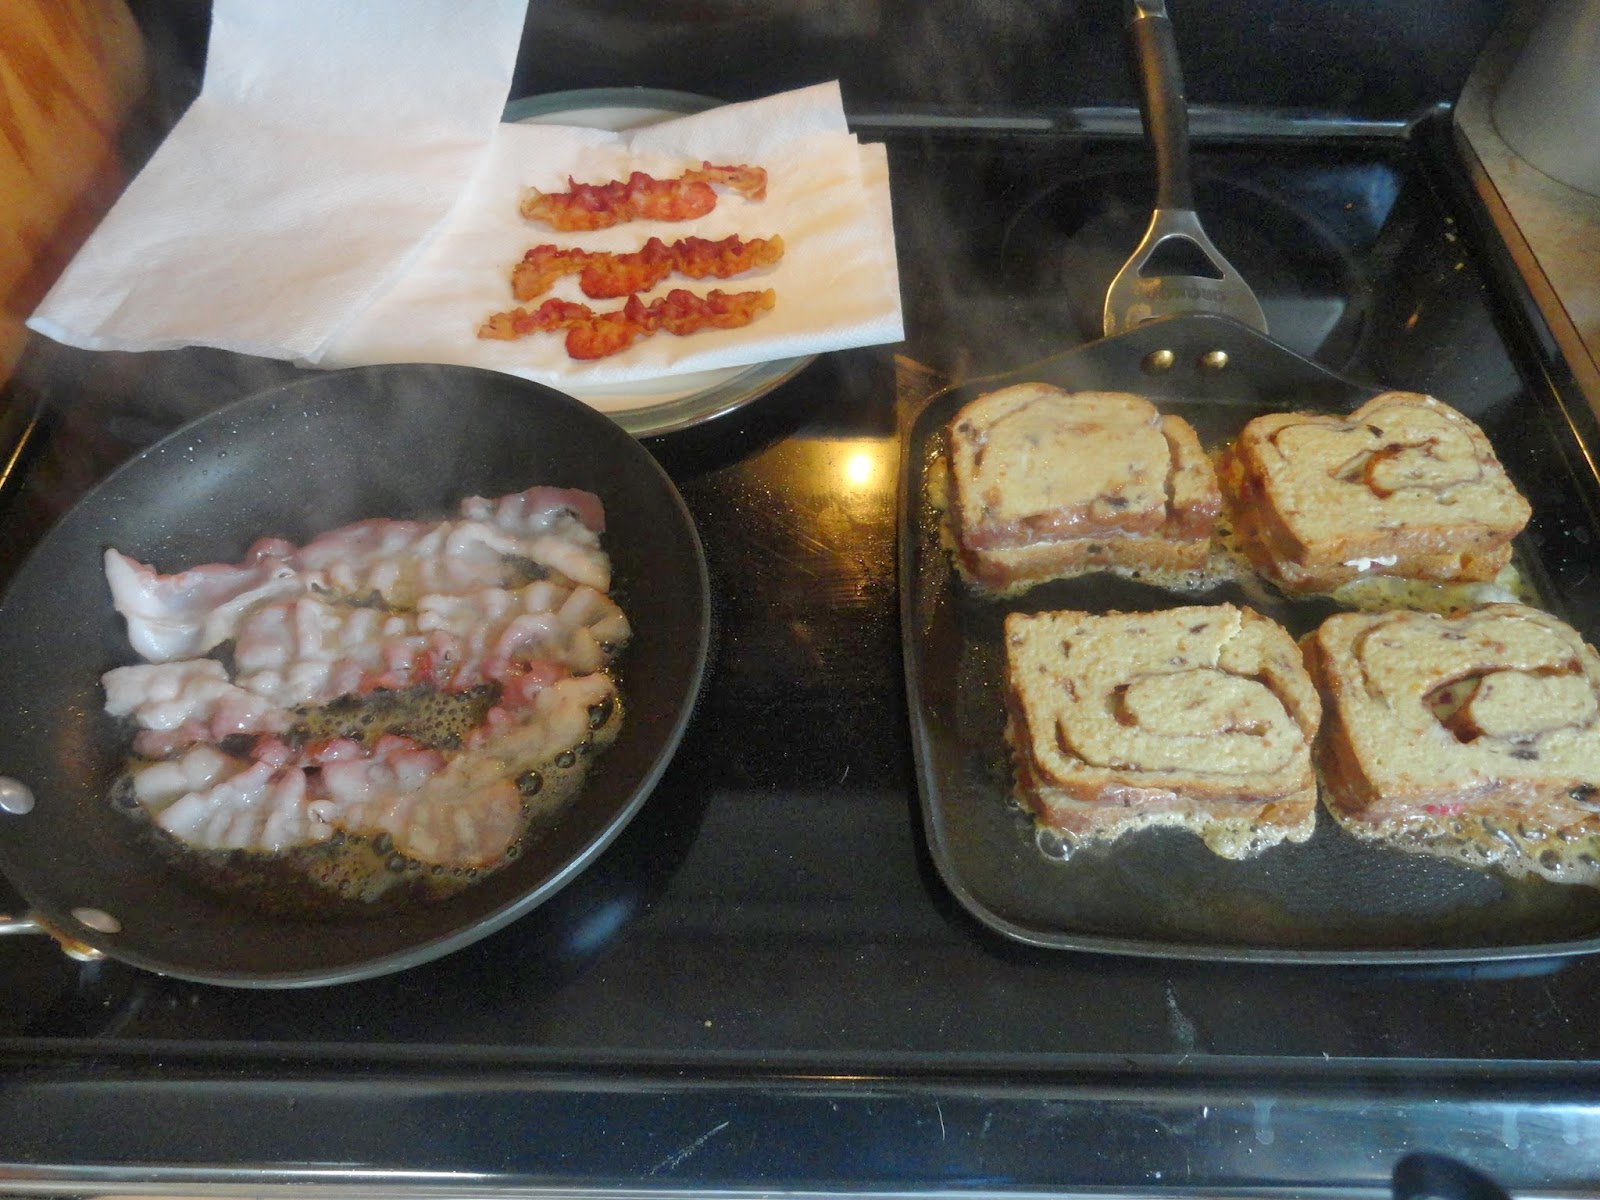
                  My husband is a pro at cooking bacon. Somehow we manage in our little kitchen.                         He only burned me once.


Because the french toast is a little thick, I noticed I maaay have cut mine into thicker than 1/4 inch...I used my panini pan top to put some weight on it so it would cook all the way through.


Cook on each side for about 3 minutes, meanwhile still cookin' up a bunch o' bacon.

When they're ready to eat, top with a coating of powdered sugar, slice in half and take pictures to make everyone jealous of what you just concocted.

Recipe for Raspberry Filling:

 All it requires is cooking down some raspberries, about a cup, with some sugar. In a saucepan on medium heat, bring to a simmer, raspberries and maybe less than 1/4 cup of sugar and some freshly squeezed lemon juice.  Once the raspberries break down, take one teaspoon of tapioca or cornstarch and mix with water. Add to the pan and cook for another 10 minutes. Let cool in the fridge until it is somewhat firm.  It'll last about 3 days or until you realize how good it tastes on almost anything...especially a spoon.


You're Welcome.

Saturday, March 22, 2014

Can't. Stop. Eating. This.

Warning: This is NOT by any means a healthy recipe but it does make excellent use of leftovers, not very expensive to make and overall god damn delicious. Please, stop yourself after two helpings to be sure you have enough for the next day, because you will shed some tears after it is all gone.

Who doesn't like a good ole' box of Kraft macaroni and cheese once in a while? Minus all the crap they put in it...I've graduated from that and moved on to the real deal with real ingredients and no artificial coloring or flavoring.

Macaroni and cheese is the ultimate comfort food and I like to feel comforted ALL the time.  The homemade mac and cheese I'm used to is my Noni's. She bakes it in the oven, adds lots of milk, uses American cheese and a variety of noodles, usually spaghetti and elbows. The best part is the few slices of cheese she puts on towards the very end that get all brown and crispy. We all usually fight over that part, in addition to the "coolie" end of the loaf of Italian bread.

A few years ago I began making my own mac and cheese, starting with a bechamel sauce then throwing it in the oven. I tried to make it a bit more "healthy" by adding broccoli or peas but it just took away from that comforting feeling I get in my belly when I eat a whole bowl of creamy, oozy, unable to move, deliciousness.

I started using my crock pot to make mac and cheese, after coming across a recipe for it, which I cannot remember from where.  It's quick and easy and requires the least amount of steps.  As incredible and easy as it was, it was missing that toasty almost burnt cheese on the top that I love from my Noni's.

I got home late the other night and had my heart set out on eating some crock pot mac and cheese but now I just didn't have the time. It usually takes about 3-4 hours on a low setting for everything to melt together. So I figured I'd go back to the traditional way of putting it in the oven, solving my cheese crisp dilemma as well.  Have I mentioned that this recipe is for BUFFALO CHICKEN mac and cheese?!  We have a slight addiction to anything edible with the word "buffalo" in it.

We had cooked an entire little chicken on the grill the night before and had leftovers. Frank's Red Hot Sauce is always in our fridge. I knew I wanted to make mac and cheese soon, so the last time I went to the grocery store, I picked up a package of mixed cheese from the deli. They usually toss the "scraps" from the ends of different cheeses and sell it that way for only a few dollars. This is the secret to a good mac and cheese...lots of different cheeses.

I will try to do my best with the amounts since I tend not to measure so here we go....

Buffalo Chicken Macaroni and Cheese
Serves 2...lol 
Ready to eat in.. not soon enough, but if you can wait 45 minutes, you will be very happy 

About 1 good size chicken breast, cooked and chopped
1 pound of elbow macaroni
    What's left from our grilled chicken
2 1/2-3 cups of a variety of cheese (American, Cheddar, Monterrey, Swiss, Mozz, Provolone all work great)
2 cups of milk
1 egg (replaces the need for a the bechamel)
At least 1/4 cup Frank's Red Hot Original  (I add more when I'm ready to eat it)
1/2 stick of butter (cut into chunks for easy melting)
6 strips of  bacon
1/4 cup Ken's Blue Cheese Dressing (Ken's is the only blue cheese dressing)
!/2 stack of Ritz crackers, beaten with a rolling pin

Preheat the oven to 350.

Cook you macaroni per directions. Don't forget to salt your water!

While the macaroni is cooking, cook your chicken. I usually do it in a pan. You could also cook your bacon in the same pan afterwards or vice versa if you want to give your chicken some extra bacony flavor. To see other ways to cook bacon check out my post, The Potatoes Have Eyes...

Combine your milk and egg.

In a bowl, throw in your chopped chicken, cheese, bacon crumbles, milk and egg mixture, butter and hot sauce.  When the pasta is drained, toss it right on top of the other ingredients in the bowl and combine until everything is incorporated.
Leftover chunks of cheese from the deli! Only $3.45

Put the ingredients in a large baking dish. Cover with tin foil and bake for about 25 minutes, stirring frequently making sure all the ingredients are fully doused in cheese and hot sauce. You may also notice you might need a little bit more milk if the pasta is too dry. Add some and stir.

After 25 minutes, drizzle on your blue cheese dressing and stir carefully. We wouldn't want any of this to get wasted on the bottom of the oven!  Last, sprinkle your crushed Ritz crackers on top.

Broil for about 2 minutes or until the top is nice and toasty!

If you want to try the crock pot version, I highly recommend it! All you would do is combine all the ingredients in your crock pot and cook it on a lower temp for just a few hours. Like I said, it's super easy and comes out great but lacks the texture of oven baked mac and cheese. I would not put crackers in top. They might just get a little mushy.

If for some strange reason you don't like buffalo sauce...I can't imagine anyone who wouldn't...you can omit it. You can even omit the bacon too and try to make it with veggies but as I also said, for me, it's just not the same. Sauteed onions would be a good addition as well.

When you want to reheat this either later that night for a snack or the next day for breakfast, pour a little bit more milk on it and probably some more hot sauce too. You can never have enough. It will make it nice and moist again.

You're Welcome.

Monday, March 17, 2014

Potato Chips are definitely Irish...even with chocolate on them

Every St. Patrick's Day I make Irish Car Bomb Cupcakes. There's not really a great story behind it except for the fact that they remind of the very first St. Patrick's Day I saw my husband completely wasted. We ended the night almost having the cops called on us for doing the Irish jig in my sister's apartment. He had also been a declared "straight edge" for several years, only being 20 at the time, so this was quite the scene....many car bombs later.

I don't use fondant. I don't eat fondant. It just tastes too artificial for me. Each year I make these cupcakes, I try to think of a good decoration which must be edible. This year I thought, "What goes better with beer and booze than a potato chip?!"  I also got the idea after enjoying a late night snack of Lay's chips and on the bag it specifically read "Recipe for a perfect night: 1)Handful of Wavy Chips; 2) Sprinkle of Chocolate Chips; 3) 20 seconds in the microwave. Instant sweet and savory satisfaction."  Who in their right mind would ever question why this would be good and why would it be on a cupcake?!?!  My brother did. I replied, "Jeff are kidding me?!?  It's a CHOCOLATE COVERED POTATO CHIP! It's amazing by itself then when you put it on an Irish Car Bomb cupcake....Oh Man!!....so good!" He said again, " Yeah, but why a potato chip?" I told him " Duh, beer and chips!"  As I told this story to my friend the next day, it occurred to me that potatoes are totally an Irish staple and somehow subconsciously I knew this, which is why I also knew it would be amazing on an Irish Car Bomb cupcake. Which, of course, it was.

Irish Car Bomb Cupcakes

Make 24

Cupcakes:
3/4 cup butter, softened
4 eggs
2 cups flour
3/4 cocoa powder, sifted
1 tsp baking soda
3/4  tsp baking powder
2 cups sugar
2 tsp vanilla
3/4 cup milk
3/4 cup Guinness

Filling:
8 oz semi sweet chocolate chips
3/4 heavy whipping cream
4 TB whiskey

Frosting:
4 stick butter
4 cups powdered sugar
4 TB Bailey's Caramel Flavor

Preheat oven to 350.
For cupcakes:
Cream together butter and sugar.  Crack open eggs in a separate bowl to come to room temperature.

In a separate bowl, sift flour, cocoa, baking powder and baking soda.

When sugar and butter is combined, add eggs and vanilla. Be sure to use a rubber spatula to scrape the bottom and sides of the bowl.

Measure milk and beer.

Slowly add dry ingredients to the sugar and egg mixture, alternating with the milk and beer.

Bake for bout 18 minutes or until a tooth pick comes out clean. 

For the Filling:
Over a double boiler or in the microwave, melt chocolate and 1/4 heavy cream together. Add whiskey. You may want to add more depending on how strong you want it to be. Set aside to cool.

In a separate bowl, whisk 1/2 cup of heavy cream on high speed until stiff peaks form.

Once the chocolate is cool to the touch, fold a small amount of whipped cream into it. Gradually add the rest and refrigerate for at least one hour.

For the Frosting:
Beat 4 sticks of butter in your mixer until smooth. Gradually add the powdered sugar and Bailey's until smooth.

For the Chocolate Covered Potato Chip:
Buy a bag of Lay's Wavy Potato Chips. Read the back of the bag and follow those directions.
Or you can dip your chips in your melted chocolate for the filling before, or after you add the whiskey!

Assembly:
Using a sharp paring knife, carve out small quarter sized holes in the cupcakes. My husband love snacking on these later.  If you want more Guinness flavor in your cupcake, brush the tops with some beer.
I usually use a pastry bag but you can use a spoon to fill each cupcake with the whiskey mousse filling.
Pipe frosting on and top with a chocolate potato chip.
Enjoy immediately and with friends over a pint of Guinness. Then repeat.

So yes...potato chips, especially covered in chocolate, make the perfect decor for an Irish Car Bomb cupcake, Jeff! Or any cupcake for that matter!

Oh and they were devoured by several crew members from  WPLR Chaz and AJ morning show!!! I even got a shout out on the radio the next day...but I missed it $%#@^*!

Saturday, March 15, 2014

The Potatoes Have Eyes...


potatoes-medium
Photo www.newlifeonahomestead.com
White potatoes have gotten a pretty bad reputation I feel like and honestly, I kinda miss eating them. They're known as being really starchy, filling and just not nutritionally beneficial to you. Sweet potatoes have become the only "good" potato....I personally LOVE sweet potatoes, especially with lots of brown sugar and butter! But how good can that be?  I recently bought some Russet potatoes because sometimes you just need a loaded baked potato with butter...and sour cream...and cheese...and bacon...and a lil broccoli. My plan was to cook a nice London Broil with a baked potato on the side. However, my husband's stomach decided to take a vacation from eating and feeling good, landing him in the emergency room two times in one week. His diet has consisted of bland, dairy free low carb, non fatty foods...served with a side of Nexium. So my "lowly" and lonely potatoes sat on the counter untouched and ignored for many days.

I hate wasting food, plus potatoes have a pretty good shelf life...until they start to grow eyes...those little green sprouts that begin to creep out of the skin (The photo is from another page I like, as I didn't take photos or expect to blog about old potatoes). Other people would probably look at them with disgust and toss them in the trash...sounds kinda like my Save the 'Nanas post. My husband wanted to put them in the garden but it being March, the ground is still frozen.  Me with my make do with what you have mentality said "Why don't we make home fries?! BUFFALO Home Fries!" Uh YES!  We love going out to breakfast and haven't been for some time. One of the places we go to has Buffalo Home Fries on the menu and they are AMAZING! I'm pretty confident I can make them at home just as good, if not better. My husband is finally feeling like he can eat real food again! I am so relieved to able to go back to normal with my cooking or even cooking at all!

I do have to give my husband credit for being the one to actually cook these up because my breakfast, as I have stated in previous posts, is coffee...with a side of more coffee. He is the one to cook breakfast 9 times out of 10.  But I have made these home fries before for him so I talk him through the steps as I drink my breakfast in front of the laptop.

Buffalo Home Fries
Makes about 2-3 servings

2 large Russet potatoes
Half of a white onion
Half a stick of butter
Olive oil
Frank's Red Hot Sauce
Paprika
Garlic Powder
Bacon

The potatoes have to be partially cooked before entering the pan. I have a handy little button on my microwave strictly for cooking potatoes. Pull off the eyes, pierce them with a fork a few times and pop em in for about 5 minutes. You want them to be somewhat soft but not completely cooked or else they will turn to smashed potatoes in your pan.

While the potatoes are cooking, heat a skillet on medium heat.

Dice your onions. As ridiculous as you will look and as silly as it sounds, wearing sunglasses while you chop onions usually helps prevent your eyes from watering. Add 2 TBS of butter to your pan. Add the onions.

When the potatoes are done, chop into chunks discarding any brown sections or parts that don't look good. Toss them in the pan with the onions.

While the potatoes and onions are cooking, make your bacon and set aside. I have a few different methods to cook bacon. My husband prefer the stove top way, but I kinda like the microwave method.
  1. Stove Top- Cook in a separate pan over medium heat, flipping a few times. Place on a paper towel to absorb excess grease.
  2. Broiler- On a tin foil lined pan, place strips of bacon under the broiler for about 8 minutes.
  3. Microwave- Line a microwaveable dish with a paper towel and place strips of bacon. Cover with another paper towel and microwave for about 3-4 minutes until bacon is crisp.
Add the rest of the butter to the pan of potatoes and put the heat on medium high. Drizzle some olive oil if the pan gets too dry. To get a nice crispiness to the potatoes the pan should be moist and on a higher heat. Toss and flip your potatoes often so they cook evenly on all sides.

Add some sprinkles of paprika and garlic powder, maybe about 1/4 tsp.  Squirt as much or as little hot sauce on the potatoes still in the pan. We likes things super spicy so I do about 10 shakes of the bottle then add more once they're on my plate.

My husband's breakfast
Once the potatoes are brown and crispy, crumble your bacon on top and serve with a side of Ken's Blue Cheese dressing...or Ranch works too.

I think potatoes will reenter my kitchen again. They really aren't all that bad for you and do have great health benefits...I mean they grown under the ground and absorb all kinds of nutrients from the soil. I kinda feel like I'm eating the Earth when I have a potato. Can't have them all the time with heavy toppings but there are sooooo many other things you can do with with them.

Instead of potato "flakes" make some real effing mashed potatoes!!!
My breakfast


Thursday, March 6, 2014

Ikea...Crappy Furniture, Great Food

My husband and I went to Ikea over the weekend.  All I wanna do when I enter this store is plop myself in a Poang Chair with a huge plate of Swedish meatballs, a cinnamon bun and some Lingonberry juice and watch foreign people wander aimlessly through the neverending maze of poorly constructed tables and furniture only they can pronounce. I have a love/hate relationship with this place. We quickly go through the entire store trying to find bed slats for our Malm frame...it "fell apart" after the heart shaped pancake breakfast my husband so enjoyed. Finally, we find what we need in the huge warehouse style "self serve" area then wait in the longest line ever with our one measly item behind everyone else buying bed frames, tupperware and wicker baskets. I would really really hate standing in line so much if it weren't for the incredibly delectable smell of food wafting through the air. Spending the day at Ikea and getting lunch was one of my favorite things to do with my cousin when she lived here. Miss that. My mind is instantly distracted from the long wait still ahead and my stomach is suddenly growling.  Swedish meatballs will definitely by on the menu tonight and in my belly.

I've made them before but have used cream of mushroom soup. I no longer use many premade products, especially in cans, so my go to is usually Pinterest. The recipe I adapted below comes from two different sources; Skinnytaste and Damn Delicious. I didn't like either recipe in its entirety so I made my own.

Swedish Meatballs
Serves 3-4

1 lb ground beef (I use grass fed when I can. It's about $6 for a pound)
About 2 stalks of celery, minced
1 small onion, minced
2 cloves of garlic, minced
1 egg
1/4 cup breadcrumbs (I use Ian's Organic Panko)
2-3 cups beef broth
3/4 cup chopped mushrooms
1/2 cup sour cream (or you can substitute with Greek yogurt!)
1/2 tsp allspice (original recipe called for nutmeg but I didn't have it)
1 tsp parsley (fresh is better but all I had was dried)
salt and pepper
3 TBS butter
2 TBS flour

Drizzle some olive oil in a skillet over medium heat.
Throw in your onions and celery. Cook until translucent. Add garlic and parsley. Cook for about two more minutes then set aside to cool.


In a bowl, combine beef, breadcrumbs, egg, salt and pepper. Add onion/celery mixture and form into one inch balls.

On medium high heat, in the same pan you cooked the onion, place the meatballs. Pour enough beef broth in so meatballs are halfway covered. Cover and let simmer for about 15 minutes.


Once the meatballs are done, remove from the pan and set aside. There should be some broth left in the pan. With heat still on medium high, add your butter to the leftover juices. Bring to a simmer, using a wooden spoon to deglaze your pan and scrape up all the little remnants of flavor from the onions and meatballs.

When the broth and butter are incorporated, sprinkle your flour in to make a roux. Lower the heat to medium.Whisk vigorously to make a thick paste, which will be the base of your sauce. Slowly add your remaining beef broth( about a cup), still whisking to prevent lump from forming. If your sauce seems to be too watery, you can add more flour. If it is too thick, you can add more broth.  

Add the sour cream a spoonful at a time so it does not curdle. It may slightly but no worries. Add your allspice and salt and pepper to taste. Last, throw in your chopped mushrooms and a little more parsley. Let simmer for about 5 more minutes.

Serve immediately over egg noodles and meatballs.  For a lower carb version, this can be served over cauliflower rice too. Leftover meatballs can be frozen!